Week 04 Laboratory Exercises
Objectives
- using arrays
- using struct arrays
- creating functions
- using while loops for repetition
Activities To Be Completed
This lab is worth a total of 1.4 marks and consists of the following activities:
| Type | Activities | Weight |
|---|---|---|
| One-dot (●◌◌) |
devowel print_pi_style scanning_into_array_style points |
15% |
| Two-dot (●●◌) |
savings_analysis cs_calculator |
15% |
| Three-dot (●●●) |
detective rewrite_letters |
Not worth marks |
| Additional |
class_details debug_letter_search debug_cloud fractal_turtle splashkit_master |
Not worth marks |
| Group presentation |
presentation4 |
70% |
Lab exercises are capped at 15 marks. For more details, see the course outline.
Exercise
(●◌◌)
:
Devowelling Text
Write a C program devowel.c which reads characters from its input and writes
the same characters to its output, except it does not write lower case vowels
('a', 'e', 'i', 'o', 'u').
Your program should stop only at the end of input.
Examples
dcc devowel.c -o devowel
./devowel
Are you saying 'Boo' or 'Boo-Urns'?
Ar y syng 'B' r 'B-Urns'?
In this house, we obey the laws of thermodynamics!
In ths hs, w by th lws f thrmdynmcs!
1091 style devowel.c
When you think your program is working,
you can use autotest
to run some simple automated tests:
1091 autotest devowel
When you are finished working on this exercise,
you must
submit your work by running give:
give dp1091 lab04_devowel devowel.c
You must run give
before Monday 16 February 09:00
to obtain the marks for this lab exercise.
Note that this is an individual exercise,
the work you submit with give must be entirely your own.
Exercise
(●◌◌)
:
Print out pi to a certain number of digits
Good code style is required for this exercise.
To get full marks in this exercise, you MUST pass the automatic style checker
(1091 style).
If 1091 style finds any issues in your code, the maximum mark you can
achieve for this exercise is capped at 75%.
To run the automatic style checker on your code, use the following command:
1091 style print_pi_style.c
Download print_pi_style.c here
Or, copy these file(s) to your CSE account using the following command:
1091 fetch-activity print_pi_style
Your task is to add code to these functions in print_pi_style.c:
void print_pi_style(int num_digits) {
    // DO NOT CHANGE THIS LINE
    int pi[MAX_DIGITS] = {3, 1, 4, 1, 5, 9, 2, 6, 5, 3};
    // TODO: Finish this function below

}
Write a C program, print_pi_style.c, which prints out the first n digits of
pi, where n is specified by the user.
The main function has already been written for you. There's an empty function
that has been provided for you called print_pi_style that takes in one
integer as an argument.
Place your code (only the printing code) inside this function. You can NOT put all of your code in main for this exercise, main must remain unmodified.
Examples
dcc print_pi_style.c -o print_pi_style
./print_pi_style
How many digits of pi would you like to print? 3
3.14
./print_pi_style
How many digits of pi would you like to print? 5
3.1415
./print_pi_style
How many digits of pi would you like to print? 10
3.141592653
Assumptions/Restrictions/Clarifications
- You can assume that n >= 2 AND n <= 10, however, do not use this as a reason to avoid while loops.
1091 style print_pi_style.c
When you think your program is working,
you can use autotest
to run some simple automated tests:
1091 autotest print_pi_style
When you are finished working on this exercise,
you must
submit your work by running give:
give dp1091 lab04_print_pi_style print_pi_style.c
You must run give
before Monday 16 February 09:00
to obtain the marks for this lab exercise.
Note that this is an individual exercise,
the work you submit with give must be entirely your own.
Exercise
(●◌◌)
:
Scanning numbers into an array
Good code style is required for this exercise.
To get full marks in this exercise, you MUST pass the automatic style checker
(1091 style).
If 1091 style finds any issues in your code, the maximum mark you can
achieve for this exercise is capped at 75%.
To run the automatic style checker on your code, use the following command:
1091 style scanning_into_array_style.c
Download scanning_into_array_style.c here
Or, copy these file(s) to your CSE account using the following command:
1091 fetch-activity scanning_into_array_style
Write a C program scanning_into_array_style.c which scans in a certain amount
of numbers from the user and fills an array with them.
- First, it scans in the quantity of numbers from the user.
- Then, it scans in that many numbers from the user.
Once the array is filled with the numbers the user input, call a pre-written function that prints the minimum and maximum values in that array
Examples
dcc scanning_into_array_style.c -o scanning_into_array_style
./scanning_into_array_style
How many numbers: 5
Please enter numbers: 1
2
3
4
5
Minimum: 1
Maximum: 5
./scanning_into_array_style
How many numbers: 4
Please enter numbers: 3
-2
7
1
Minimum: -2
Maximum: 7
Assumptions/Restrictions/Clarifications
- The given inputs will always be integers.
- The given list of numbers will never be more than 100 numbers.
1091 style scanning_into_array_style.c
When you think your program is working,
you can use autotest
to run some simple automated tests:
1091 autotest scanning_into_array_style
When you are finished working on this exercise,
you must
submit your work by running give:
give dp1091 lab04_scanning_into_array_style scanning_into_array_style.c
You must run give
before Monday 16 February 09:00
to obtain the marks for this lab exercise.
Note that this is an individual exercise,
the work you submit with give must be entirely your own.
Exercise
(●◌◌)
:
Using struct arrays to store points of a shape
Download points.c here
Or, copy these file(s) to your CSE account using the following command:
1091 fetch-activity points
Complete the C program points.c, so that it scans in all the points of a shape
into an array of structs. It should then print out the points that were
given.
First, it scans in the number of points that the shape has. Then, it scans in the coordinates of each point. Afterwards, it prints out the points in order.
Examples
dcc points.c -o points
./points
How many points in the shape? 2
Enter points:
1.231 4.560
7.892 0.12

Shape Points:
 1: x = 1.231, y = 4.560
 2: x = 7.892, y = 0.120
./points
How many points in the shape? 4
Enter points:
6.340 2.781
5.675 2.453
4.893 0.123
0.232 3.349

Shape Points:
 1: x = 6.340, y = 2.781
 2: x = 5.675, y = 2.453
 3: x = 4.893, y = 0.123
 4: x = 0.232, y = 3.349
Assumptions/Restrictions/Clarifications
- When asked for the number of points, you will be given a non-zero positive integer.
- All inputs will be the correct type and non-zero positive numbers.
- The number of points will not exceed 10.
1091 style points.c
When you think your program is working,
you can use autotest
to run some simple automated tests:
1091 autotest points
When you are finished working on this exercise,
you must
submit your work by running give:
give dp1091 lab04_points points.c
You must run give
before Monday 16 February 09:00
to obtain the marks for this lab exercise.
Note that this is an individual exercise,
the work you submit with give must be entirely your own.
Exercise
(●●◌)
:
Savings Analysis
Download savings_analysis.c here
Or, copy these file(s) to your CSE account using the following command:
1091 fetch-activity savings_analysis
You have been provided with some starter code savings_analysis.c with functions for you to complete: calc_yearly_deposits, calc_yearly_spending, calc_ending_balance and calc_months_saving_goal_met. It is your job to implement the functions and complete the program.
The program reads in the user's starting balance and monthly saving goal for the year. This is followed by 12 months of deposits and 12 months of spending. The program then runs a series of functions to analyse the account over the year. It is your job to complete these functions.
Examples
dcc savings_analysis.c -o savings_analysis
./savings_analysis
Please enter starting balance: 1320
Please enter monthly saving goal: 60
Please enter monthly deposits: 208 234 182 182 208 156 156 182 208 208 234 260
Please enter monthly spending: 120 103 150 122 130 372 106 115 127 124 104 200

Yearly deposits = $2418
Yearly spending = $1773
Ending balance  = $1965
You met the monthly saving goal 9 times!
./savings_analysis
Please enter starting balance: 500
Please enter monthly saving goal: 220
Please enter monthly deposits: 800 850 900 870 820 880 890 830 910 850 860 840
Please enter monthly spending: 600 620 610 630 640 615 610 625 600 630 635 670

Yearly deposits = $10300
Yearly spending = $7485
Ending balance  = $3315
You met the monthly saving goal 8 times!
Assumptions/Restrictions/Clarifications
- The function names in your solution should be the same as the provided starter code.
- Numbers entered will always be positive integers.
- The correct amount of input will always be provided. That is, the number of monthly deposits and monthly spending will always be 12.
- You must implement the functions specified to pass the autotests and receive marks for this activity.
1091 style savings_analysis.c
When you think your program is working,
you can use autotest
to run some simple automated tests:
1091 autotest savings_analysis
When you are finished working on this exercise,
you must
submit your work by running give:
give dp1091 lab04_savings_analysis savings_analysis.c
You must run give
before Monday 16 February 09:00
to obtain the marks for this lab exercise.
Note that this is an individual exercise,
the work you submit with give must be entirely your own.
Exercise
(●●◌)
:
Create a simple calculator, reading different numbers of integers
For this exercise, make a program called cs_calculator.c which will scan in
instructions until End-Of-Input (which we enter to our terminal with the
keyboard shortcut CTRL-D) and prints the output as
specified below. An instruction is a character, followed by one or two positive
integers.
The first character identifies what type the instruction is.
- If the first character in the instruction is
's', then your program should print out the square of the next number in the instruction. - If the first character in the instruction is
'p', then your program should print out the value of the next number raised to the power of the number after next.
Examples
dcc cs_calculator.c -o cs_calculator
./cs_calculator
Enter instruction: s 2
4
Enter instruction: p 5 3
125
Enter instruction: s 4
16
Enter instruction: p 3 4
81
Enter instruction:
./cs_calculator
Enter instruction: p 3 3
27
Enter instruction: s 10
100
Enter instruction:
One major challenge of this exercise is figuring out how to use scanf
effectively. The lessons you learn in this exercise regarding scanf will be
useful in assignment 1!
Assumptions/Restrictions/Clarifications
- You can assume that the first character in the instruction is only either
's'or'p' - You can assume that for each instruction, the correct number of successive positive integers will be given.
- The autotest for this exercise expects your program to end WITHOUT a new line
character when the user presses
Ctrl-D. This means that the command prompt for the next command should be on the same line as the end of your program.
1091 style cs_calculator.c
When you think your program is working,
you can use autotest
to run some simple automated tests:
1091 autotest cs_calculator
When you are finished working on this exercise,
you must
submit your work by running give:
give dp1091 lab04_cs_calculator cs_calculator.c
You must run give
before Monday 16 February 09:00
to obtain the marks for this lab exercise.
Note that this is an individual exercise,
the work you submit with give must be entirely your own.
Exercise
(●●●)
:
Detective
Download detective.c here
Or, copy these file(s) to your CSE account using the following command:
1091 fetch-activity detective
Your mission (if you choose to accept it) is to complete the program detective.c to decipher encoded messages.
Over the past few months UNSW Security Society has found seemingly normal messages paired with random numbers. To help you solve this challenge we have created the program detective.c that reads in the message and numbers, storing them in a struct array.
We have been lucky enough to find one decoded message:
Encoded Message: muahahaha_we're_so_evil#_GNTY
Secret Numbers: 7-23-3-6-13-22-24-2-16-4-14-18-20-11-9-28-21-1-27-8-0-26-12-5-10-15-25-19-17
Deciphered Message: haha_we_are_TeasiNG_You
Our observations from this are:
- Messages seem to end with a
#. - There are always the same number of letters as there are numbers.
- Letters maintain their case between their encoded and deciphered message.
- Each number is unique counting from
0ton - 1(wherenis the number of letters).
We wish you luck detective!
Examples
dcc detective.c -o detective
./detective
Please enter Encrypted Message: muahahaha_we're_so_evil#_GNTY
Please enter Secret Numbers: 7-23-3-6-13-22-24-2-16-4-14-18-20-11-9-28-21-1-27-8-0-26-12-5-10-15-25-19-17
Secret Message is: haha_we_are_TeasiNG_You
./detective
Please enter Encrypted Message: STUDENTS_L0VE_COMP1511_#new_students_aww_:)
Please enter Secret Numbers: 28-12-24-38-6-33-36-27-16-7-19-17-39-2-11-14-32-31-41-23-18-15-0-21-35-9-40-20-1-30-5-42-4-25-13-26-37-34-22-8-29-10-3
Secret Message is: sTEw_MeET_at_Unsw_tuNneLS_11:05
Assumptions/Restrictions/Clarifications
- The maximum number of characters is 100.
- The number of characters in the encrypted message and the amount of secret numbers are the same.
- The case of each letter is preserved in translation.
- Messages will end with a
#.
1091 style detective.c
When you think your program is working,
you can use autotest
to run some simple automated tests:
1091 autotest detective
Exercise
(●●●)
:
Rewrite Letters
Download rewrite_letters.c here
Or, copy these file(s) to your CSE account using the following command:
1091 fetch-activity rewrite_letters
A sequence of characters can be rewritten by replacing a chosen character with a rewriting rule. For example, the sequence of characters "This is X" can be rewritten by replacing character 'X' with rewriting rule "COMP1511" to yield "This is COMP1511".
Rewriting can also be done with more than one character at a time. For example, the sequence of characters "All X are Y" can be rewritten by replacing X with "squares" and Y with "rectangles" to yield "All squares are rectangles".
Task
Write a C program rewrite_letters.c that rewrites an initial sequence of letters by replacing specified characters based on user-defined rules.
The program should:
- Prompt for an initial sequence of characters.
- Read the first character to replace.
- Read the rewriting rule to replace the first character.
- Read the second character to replace.
- Read the rewriting rule to replace the second character.
- Apply the rewriting rules to the initial sequence, replacing all instances of the letters to be rewritten with their replacement rule.
- Output the rewritten result.
Examples
dcc rewrite_letters.c -o rewrite_letters
./rewrite_letters
Initial letters: All @ must gather at the # immediately.
1st letter to be rewritten: @
1st rewriting rule: ninjas
2nd letter to be rewritten: #
2nd rewriting rule: chocolate fountain
All ninjas must gather at the chocolate fountain immediately.
./rewrite_letters
Initial letters: aba
1st letter to be rewritten: a
1st rewriting rule: xx
2nd letter to be rewritten: b
2nd rewriting rule: yyy
xxyyyxx
./rewrite_letters
Initial letters: How much X would a XY Y if a XY could Y X?
1st letter to be rewritten: X
1st rewriting rule: wood
2nd letter to be rewritten: Y
2nd rewriting rule: chuck
How much wood would a woodchuck chuck if a woodchuck could chuck wood?
./rewrite_letters
Initial letters: 143 = (m + n) * (m - n)
1st letter to be rewritten: m
1st rewriting rule: 12
2nd letter to be rewritten: n
2nd rewriting rule: 1
143 = (12 + 1) * (12 - 1)
Assumptions/Restrictions/Clarifications
- The following will contain 1024 characters or less:
- The sequence of initial letters.
- The rewriting rules.
- The final rewritten result.
- The letters to be rewritten will always be input by the user.
- The letters to be rewritten will be unique. For example:
- If the first letter to be rewritten is an
'a'then the second letter to be rewritten will be a letter other than'a'.
- If the first letter to be rewritten is an
- The rewriting rules will always be input by the user.
- Your program must be able to handle all printable ASCII characters (decimal
codes
32to126). This excludes any control characters (from0to31) and the delete character (127).
1091 style rewrite_letters.c
When you think your program is working,
you can use autotest
to run some simple automated tests:
1091 autotest rewrite_letters
Exercise
(●●●)
:
Harder Refactoring Code
Download class_details.c here
Or, copy these file(s) to your CSE account using the following command:
1091 fetch-activity class_details
For this activity, you've been provided with a fully working program: class_details.c.
While this code produces the correct output, it's code style is not very good.
In particular, class_detail.c is full of magic numbers and repeating code,
and it's main function is more than 200 lines long!
Try running 1511 style class_details.c to see even more of it's style issues.
For this activity your job is to go through and improve the readability of the code by
- Replacing magic numbers with enums and #defines,
- Breaking it up into small functions (less than 40 lines),
- Using those functions to remove unnecessary repetition,
- Writing some function comments to document the code.
You shouldn't change any of the actual functionality of the program i.e. none of the changes you make should change any of the program's output.
Program description
Below is a description of the program. Keep in mind that this has all already been implemented for you.
The provided program scans in and stores the details of students in a class. It first scans in the size of the class, and then scans in the details of each of the students including:
- zID
- Degree type (Undergraduate/Postgraduate)
- Major (if an Undergraduate)
- Assignments mark (Collated mark of assignments and labs)
- Exam mark
- Course grade
Once all student details have been scanned in, the program then loops and scans
in commands. It doesn't stop looping until the QUIT command is entered. The
program performs one of the following tasks:
- Command 0 Help: Display program instructions
- Command 1 (Display Student): Print the details of a specific student
- Command 2 (Display Class): Print the details of all students in a class
- Command 3 (Quit): Exit the program
Examples
dcc class_details.c -o class_details
./class_details
Enter Class Size: 1
Student 1:
Enter zID: 5111111
Select Degree Type:
0: Undergraduate
1: Postgraduate
0
Select Major:
0: Computer Science
1: Database Systems
2: eCommerce Systems
3: Artificial Intelligence
4: Programming Languages
5: Computer Networks
6: Embedded Systems
7: Security Engineering
8: None
2
Enter Assignments mark (out of 60): 35.5
Enter exam mark (out of 40): 30
Enter Command Number (0 for Help): 0
Enter a number corresponding to one of the following commands:
0 (Help): Display program instructions
1 (Display Student): Print the details of a specific student
2 (Display Class): Print the details of all students in a class
3 (Quit): Exit the program
Enter Command Number (0 for Help): 1
Enter Student zID: 5222222
No student with that zID exists
Enter Command Number (0 for Help): 1
Enter Student zID: 5111111
z5111111: {
        Degree Type: Undergraduate
        Major: eCommerce Systems
        Assignments Mark: 35.50/60
        Exam Mark: 30.00/40
        Course Grade: 65.50/100
}
Enter Command Number (0 for Help): 100
Invalid Command
Enter Command Number (0 for Help): 3
Exiting Program
./class_details
Enter Class Size: 2
Student 1:
Enter zID: 5111111
Select Degree Type:
0: Undergraduate
1: Postgraduate
0
Select Major:
0: Computer Science
1: Database Systems
2: eCommerce Systems
3: Artificial Intelligence
4: Programming Languages
5: Computer Networks
6: Embedded Systems
7: Security Engineering
8: None
6
Enter Assignments mark (out of 60): 35.5
Enter exam mark (out of 40): 30
Student 2:
Enter zID: 5222222
Select Degree Type:
0: Undergraduate
1: Postgraduate
1
Enter Assignments mark (out of 60): 40.5
Enter exam mark (out of 40): 25.9
Enter Command Number (0 for Help): 2
Students:
z5111111: {
        Degree Type: Undergraduate
        Major: Embedded Systems
        Assignments Mark: 35.50/60
        Exam Mark: 30.00/40
        Course Grade: 65.50/100
}
z5222222: {
        Degree Type: Postgraduate
        Assignments Mark: 40.50/60
        Exam Mark: 25.90/40
        Course Grade: 66.40/100
}
Enter Command Number (0 for Help): 1
Enter Student zID: 5222222
z5222222: {
        Degree Type: Postgraduate
        Assignments Mark: 40.50/60
        Exam Mark: 25.90/40
        Course Grade: 66.40/100
}
Enter Command Number (0 for Help): 3
Exiting Program
Assumptions/Restrictions/Hints
- You should not change the functionality of the program in any way
- If there are any edge cases not handled by the original code (e.g. students sharing zids), you do not need to modify the code to handle them
- All inputs will positive, and be the correct type
When you think your program is working,
you can use autotest
to run some simple automated tests:
1091 autotest class_details
Exercise — individual:
(Not For Marks) Debugging - Letter Search
Download debug_letter_search.c here
Or, copy these file(s) to your CSE account using the following command:
1091 fetch-activity debug_letter_search
Note that this exercise is not marked or worth marks!
Debugging Tips!
Some debugging tips for you:
- dcc output - as you run into issues, dcc will point you to where the errors are. Remember that dcc gives you the line number the issue is on, and will give some sort of explanation. Make sure you read everything dcc gives you. Sometimes we get “errors carried forward”, so find your first error, fix that, then recompile.
- print statements - sometimes it can be handy to see if the flow of your code puts you in the spot you expect it to be (ie. inside the right if statement, or going through a loop the correct amount of times). A quick way you can check this is by putting print statements in your code for testing purposes, like
"the value of x is %d and y is %d". This lets you check that you got against what you expected. - DPST1091 debugging guide
The Task
This exercise reads in a letter from the user, and then searches more input given by the user for that letter, or until CTRL+D is entered. It then tells the user if the search was sucessful or not.
Examples
dcc debug_letter_search.c -o debug_letter_search
./debug_letter_search
Which letter are we searching for?: g
COMP1511 is awesome!
hmmm, how about this?
what about now?
hm. How about frog?
We found g!!!
./debug_letter_search
Which letter are we searching for?: ?
No questions here.
Only sentences.
I could have a question.
Nah

The mission was not successful :(
1091 style debug_letter_search.c
When you think your program is working,
you can use autotest
to run some simple automated tests:
1091 autotest debug_letter_search
Exercise — individual:
(Not For Marks) Debugging - Clouds
Download debug_cloud.c here
Or, copy these file(s) to your CSE account using the following command:
1091 fetch-activity debug_cloud
Note that this exercise is not marked or worth marks!
Debugging Tips!
Some debugging tips for you:
- dcc output - as you run into issues, dcc will point you to where the errors are. Remember that dcc gives you the line number the issue is on, and will give some sort of explanation. Make sure you read everything dcc gives you. Sometimes we get “errors carried forward”, so find your first error, fix that, then recompile.
- print statements - sometimes it can be handy to see if the flow of your code puts you in the spot you expect it to be (ie. inside the right if statement, or going through a loop the correct amount of times). A quick way you can check this is by putting print statements in your code for testing purposes, like
"the value of x is %d and y is %d". This lets you check that you got against what you expected. - DPST1091 debugging guide
The Task
This exercise reads in some cloud heights from a user and works out what type of clouds they are. The program then prints out the total count for all the types.
Note that fog clouds are the lowest, then cumulo, then alto, then cirro clouds occur at the highest heights.
Examples
dcc debug_cloud.c -o debug_cloud
./debug_cloud
Enter some clouds:
200
550
880
2500
100000

CLOUDS
There are 1 fog clouds
There are 2 cumulo clouds
There are 1 alto clouds
There are 1 cirro clouds
./debug_cloud
Enter some clouds:
65000
80000
3000
4000
4690.23
12.54
24.57
8

CLOUDS
There are 3 fog clouds
There are 0 cumulo clouds
There are 3 alto clouds
There are 2 cirro clouds
1091 style debug_cloud.c
When you think your program is working,
you can use autotest
to run some simple automated tests:
1091 autotest debug_cloud
Exercise — individual:
(Not for Marks) Fractal Turtle 🐢 (extra-hard)
Download fractal_turtle.c here
Or, copy these file(s) to your CSE account using the following command:
1091 fetch-activity fractal_turtle
The goal of this activity is to display fractals on the terminal. To do this, three topics are combined:
- Turtle Graphics - to draw images based on sequences of characters.
- L-Systems - to generate sequences of characters.
- Fractals - the types of images we are interested in.
These topics will be introduced, followed by instructions for the activity.
Turtle Graphics
Turtle Graphics is a simplified drawing system where an imaginary turtle moves around the screen according to commands.
Initially, the turtle faces up towards the top of the screen. It then follows commands to draw on the canvas:
Fmoves the turtle forwards 2 steps while painting a line.fmoves the turtle forwards 2 steps, without painting a line.+turns the turtle left by 90 degrees.-turns the turtle right by 90 degrees.
Using these commands, we can create images by instructing the turtle where to move and when to draw.
For example, if we wanted to paint the blue shapes in Figure 1, we could use the instructions FFF-FffF-F-fff+f+F-FF. Our turtle would interpret this sequence of characters according to the annotations in Figure 2.
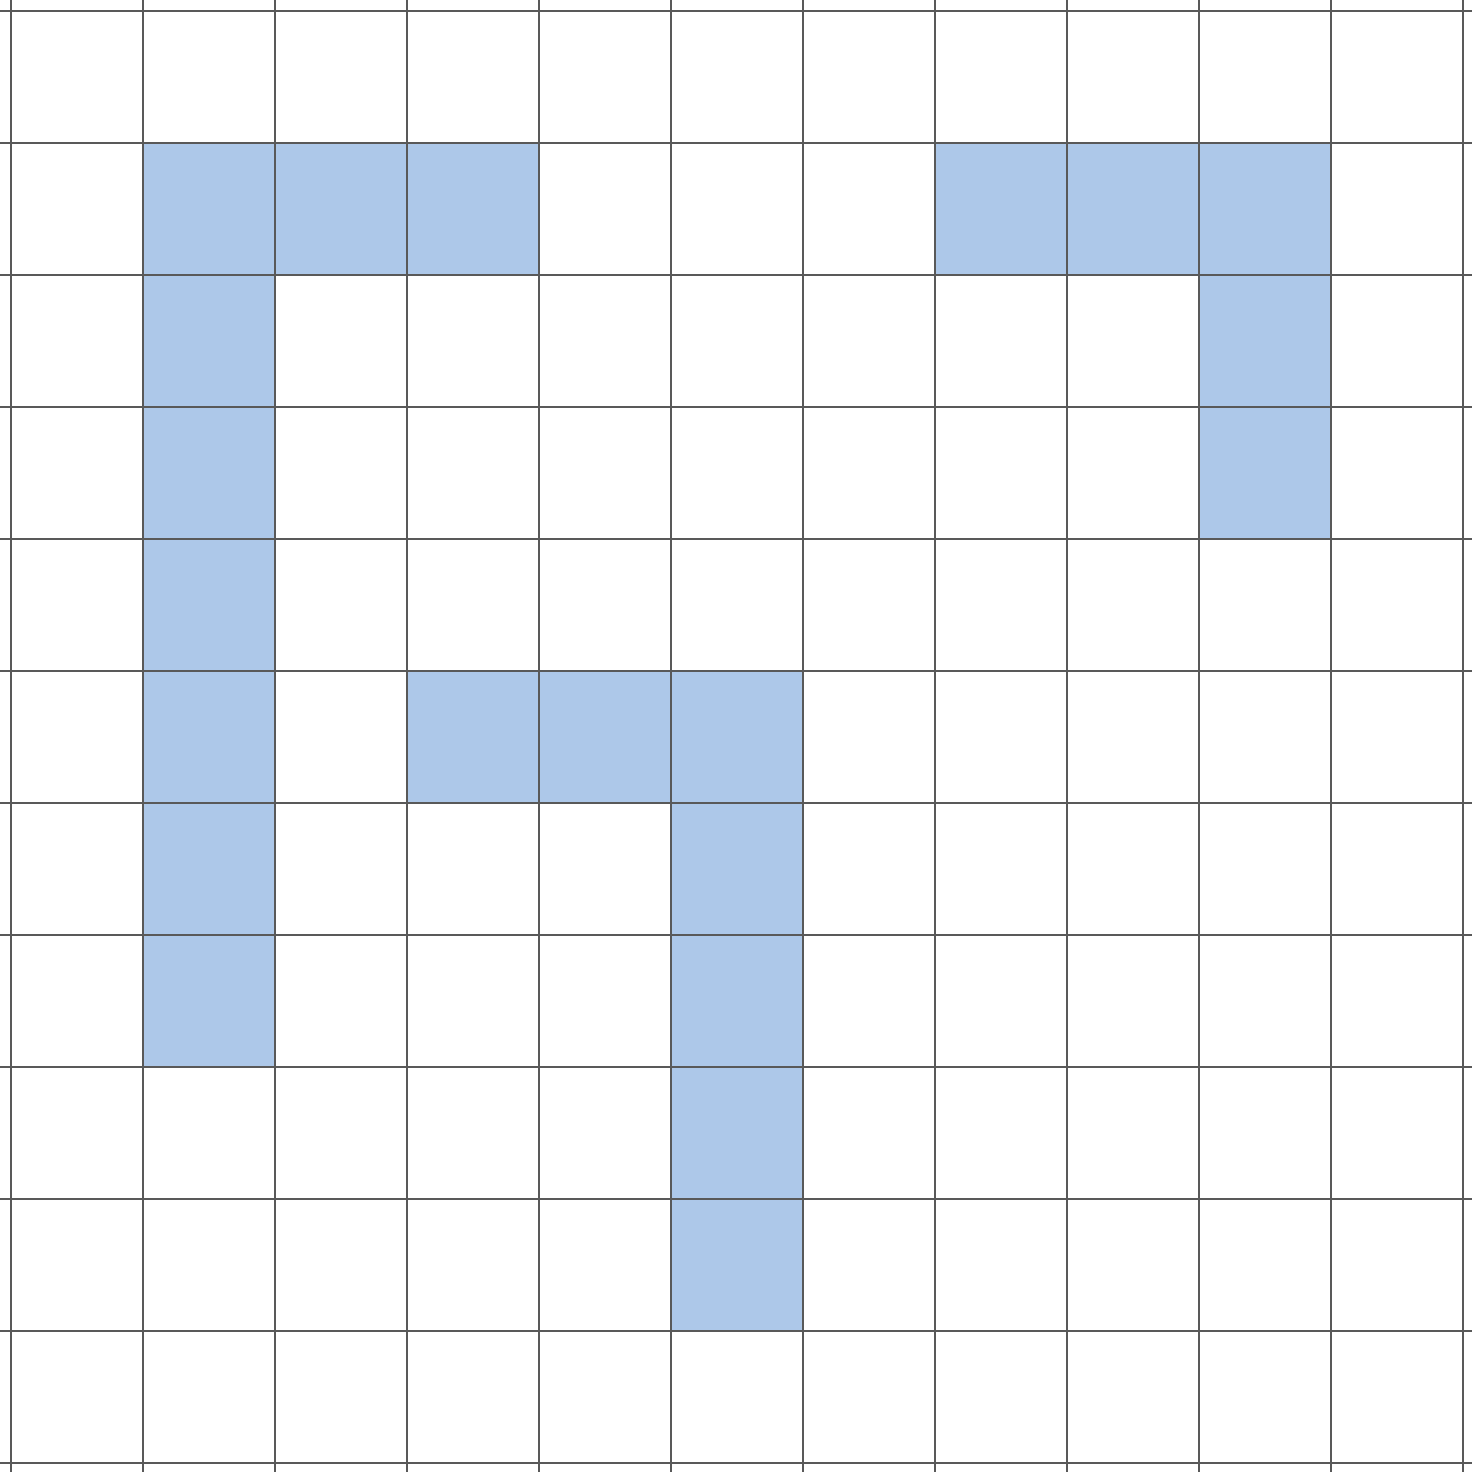
Figure 1. Example turtle graphic.
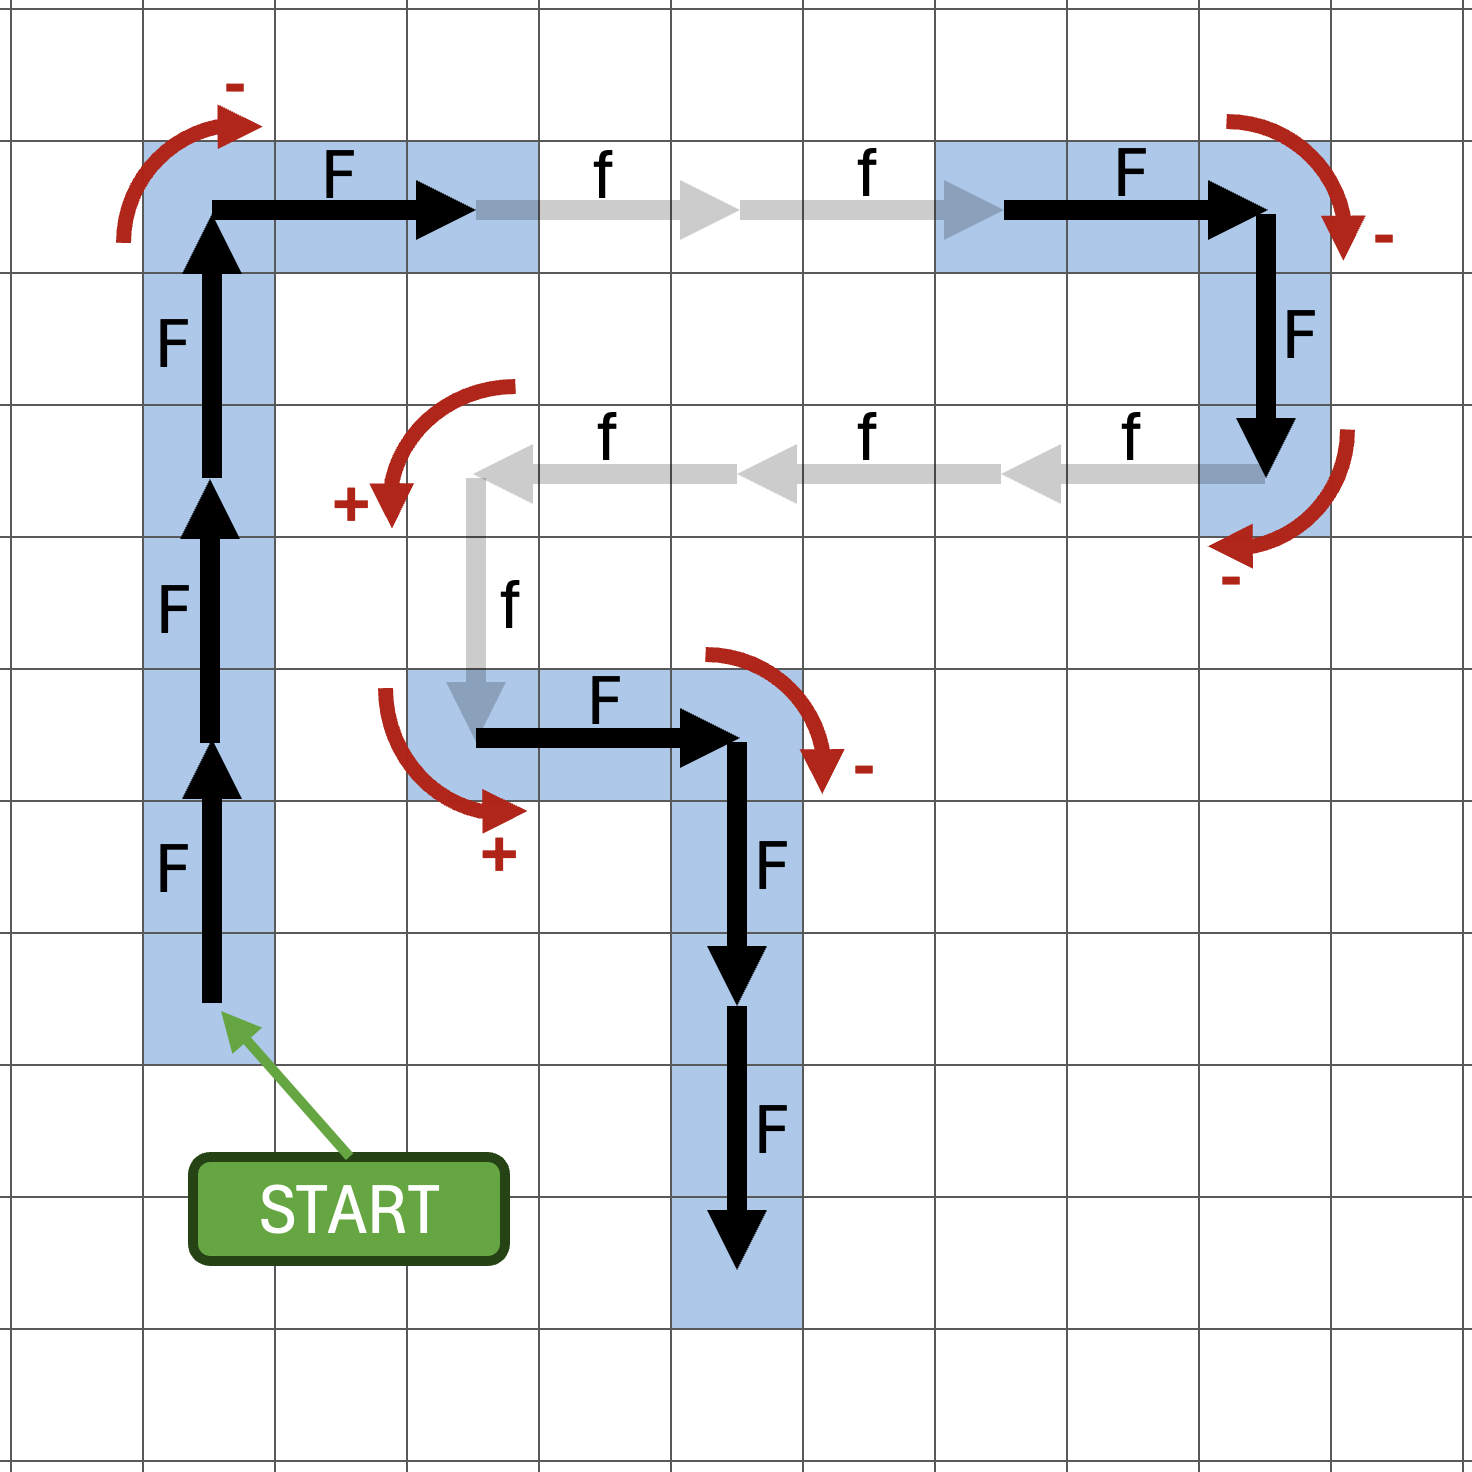
Figure 2. Turtle interpretation of FFF-FffF-F-fff+f+F-FF.
But how can we represent these graphics in the terminal?
We could choose to represent each blue painted tile by a hash '#', and each unpainted tile by a space ' '. But due to the unequal heights and widths of characters printed to the terminal, this results in the skewed image shown by Figure 3.
###   ###
#       #
#       #
#
# ###
#   #
#   #
    #
    #
Figure 3. Sad turtle graphics ☹.
Luckily, this can be fixed! We represent each tile as two characters on the terminal:
- For each painted tile, we use two characters: a space
' 'followed by a hash'#'i.e." #". - For each unpainted tile, we use two spaces i.e.
" ".
This results in the terminal output shown in Figure 4. Compare this to Figure 1.
 # # #       # # #
 #               #
 #               #
 #
 #   # # #
 #       #
 #       #
         #
         #
Figure 4. Happy turtle graphics 🐢.
 # # #
 #   #
 # # #
Figure 5. The turtle interpretation of F-F-F-F draws a square.
     #
     #
 # # #
 #
 # # # # #
         #
     # # #
     #
     #
Figure 6. The turtle interpretation of F-F+F+FF-F-F+F draws a squiggle.
     #
     #
     #
     #
 # # # # #
 #       #
 # # # # #
     #
     #
     #
     #
Figure 7. The turtle interpretation of FF+F-F-FF-F-F-fFF draws a circuit element.
         #
         #
         #   # # #
         #   #   #
         #   #   #
         #   #   #
 # # #   #   # # #
 #   #   #
 #   #   #
 #   #   #
 # # #   #
         #
         #
Figure 8. The turtle interpretation of F+f-FF+F+FF+Ff+FF-f+FF-F-FF-Ff-FFF draws a birds-eye view of a road with two cars.
L-Systems
Writing out long sequences (such as F+f-FF+F+FF+Ff+FF-f+FF-F-FF-Ff-FFF) can be tedious and error-prone. Instead, we use a find-and-replace method known as an L-System to generate these sequences automatically. We begin with a short sequence and apply simple rules to expand it into larger sequences.
An L-system is a set of rules used to generate complex sequences of characters.
Given a sequence of characters, we can rewrite it by replacing chosen characters according to designated rules.
For example, starting with an initial sequence of characters "abc" we could rewrite it by replacing:
- every
awith rule"ba", and - every
bwith rule"baab".
Initially, we have:
"abc"
After one rewrite:
"babaabc"
After the second rewrite:
"baabbabaabbababaabc"
And so on...
Each rewrite replaces every occurrence of a character with the sequence of characters from its corresponding rule.
By employing L-systems, we can use simple rules to systematically produce long and complex sequences of characters.
Fractals
For this activity: a fractal is a shape that repeats a pattern at difference scales.
For example, suppose we begin with the single vertical line in Figure 9 resulting from the turtle interpretation of F.
 #
 #
 #
Figure 9. A single vertical line: F.
If we replace F with F-F+F+FF-F-F+F (i.e. replace it with the squiggle from Figure 6) the rewritten sequence of characters is F-F+F+FF-F-F+F, and is shown by Figure 10. We've replaced every line by a squiggle, and since we started with one line, the result is one squiggle.
     #
     #
 # # #
 #
 # # # # #
         #
     # # #
     #
     #
Figure 10. The turtle interpretation of F-F+F+FF-F-F+F is a squiggle.
Now we're at the main point of this exercise: what if we do it again? Let's replace every line (every F character) in the squiggle F-F+F+FF-F-F+F with another squiggle F-F+F+FF-F-F+F.
The rewritten result is the long sequence of characters F-F+F+FF-F-F+F-F-F+F+FF-F-F+F+F-F+F+FF-F-F+F+F-F+F+FF-F-F+FF-F+F+FF-F-F+F-F-F+F+FF-F-F+F-F-F+F+FF-F-F+F+F-F+F+FF-F-F+F. The turtle interpretation of these commands is illustrated in Figure 11 to be a squiggle of squiggles!
At this point it's worth pausing to observe that this shape is a large squiggle, where every edge has been replaced by a smaller squiggle. This is an example of what we're calling a fractal: a shape that repeats a pattern at different scales.
                     #
                     #
                 # # #
                 #
                 # # # # #
                         #
             # # #   # # #
             #   #   #
     # # #   #   # # #
     #   #   #
 # # #   # # #
 #
 # # # # #
         #
     # # #   # # #           # # #
     #       #   #           #   #
     # # #   #   # # # # #   #   # # #
         #   #           #   #       #
         # # #           # # #   # # #
                                 #
                                 # # # # #
                                         #
                             # # #   # # #
                             #   #   #
                     # # #   #   # # #
                     #   #   #
                 # # #   # # #
                 #
                 # # # # #
                         #
                     # # #
                     #
                     #
Figure 11. A squiggly-squiggle resulting from replacing F by F-F+F+FF-F-F+F two times.
Task
Write a C program fractal_turtle.c that repeatedly rewrites an initial sequence of characters by replacing characters 'F' and 'f' with user-defined rules, and then prints a turtle interpretation of the resulting sequence to the terminal.
The program should:
- Read an initial sequence of characters consisting of any combination of
'F','f','+', or'-'. - Prompt the user to enter a rewriting rule for
'F'. - Prompt the user to enter a rewriting rule for
'f'. - Ask for the number of times to apply the rewriting rules.
- Apply the rewriting rules, replacing each instance of
'F'and'f'with the corresponding rewriting rule. Revisiting the section on L-Systems may be helpful here. - Print each intermediate rewrite (e.g. the initial string, the 1st rewrite, the 2nd rewrite, etc) to the terminal.
- Output the turtle interpretation of the final sequence of rewritten characters to the terminal.
Examples
dcc fractal_turtle.c -o fractal_turtle
./fractal_turtle
Initial characters (F, f, -, +): F
Rewriting rule for 'F': F-F+F+FF-F-F+F
Rewriting rule for 'f': f
Number of times to apply the rewriting rules: 1
Rewrite 0: F
Rewrite 1: F-F+F+FF-F-F+F
     #
     #
 # # #
 #
 # # # # #
         #
     # # #
     #
     #
./fractal_turtle
Initial characters (F, f, -, +): F
Rewriting rule for 'F': F-F+F+FF-F-F+F
Rewriting rule for 'f': f
Number of times to apply the rewriting rules: 2
Rewrite 0: F
Rewrite 1: F-F+F+FF-F-F+F
Rewrite 2: F-F+F+FF-F-F+F-F-F+F+FF-F-F+F+F-F+F+FF-F-F+F+F-F+F+FF-F-F+FF-F+F+FF-F-F+F-F-F+F+FF-F-F+F-F-F+F+FF-F-F+F+F-F+F+FF-F-F+F
                     #
                     #
                 # # #
                 #
                 # # # # #
                         #
             # # #   # # #
             #   #   #
     # # #   #   # # #
     #   #   #
 # # #   # # #
 #
 # # # # #
         #
     # # #   # # #           # # #
     #       #   #           #   #
     # # #   #   # # # # #   #   # # #
         #   #           #   #       #
         # # #           # # #   # # #
                                 #
                                 # # # # #
                                         #
                             # # #   # # #
                             #   #   #
                     # # #   #   # # #
                     #   #   #
                 # # #   # # #
                 #
                 # # # # #
                         #
                     # # #
                     #
                     #
./fractal_turtle
Initial characters (F, f, -, +): F-F-F-F
Rewriting rule for 'F': F-F+F+FF-F-F+F
Rewriting rule for 'f': f
Number of times to apply the rewriting rules: 1
Rewrite 0: F-F-F-F
Rewrite 1: F-F+F+FF-F-F+F-F-F+F+FF-F-F+F-F-F+F+FF-F-F+F-F-F+F+FF-F-F+F
             # # #
             #   #
     # # #   #   # # #
     #   #   #       #
 # # #   # # #   # # #
 #               #
 # # # # #       # # # # #
         #               #
     # # #   # # #   # # #
     #       #   #   #
     # # #   #   # # #
         #   #
         # # #
dcc fractal_turtle.c -o fractal_turtle
./fractal_turtle
Initial characters (F, f, -, +): F
Rewriting rule for 'F': FF+F-F-FF-F-F-fFF
Rewriting rule for 'f': f
Number of times to apply the rewriting rules: 1
Rewrite 0: F
Rewrite 1: FF+F-F-FF-F-F-fFF
     #
     #
     #
     #
 # # # # #
 #       #
 # # # # #
     #
     #
     #
     #
./fractal_turtle
Initial characters (F, f, -, +): F
Rewriting rule for 'F': FF+F-F-FF-F-F-fFF
Rewriting rule for 'f': fffff
Number of times to apply the rewriting rules: 2
Rewrite 0: F
Rewrite 1: FF+F-F-FF-F-F-fFF
Rewrite 2: FF+F-F-FF-F-F-fFFFF+F-F-FF-F-F-fFF+FF+F-F-FF-F-F-fFF-FF+F-F-FF-F-F-fFF-FF+F-F-FF-F-F-fFFFF+F-F-FF-F-F-fFF-FF+F-F-FF-F-F-fFF-FF+F-F-FF-F-F-fFF-fffffFF+F-F-FF-F-F-fFFFF+F-F-FF-F-F-fFF
                         #
                         #
                         #
                         #
                     # # # # #
                     #       #
                     # # # # #
                         #
                         #
                         #
                         #
                         #
                         #
                         #
                     # # # # #
                     #       #
                     # # # # #
                         #
             # # #       #       # # #
             #   #       #       #   #
     # # # # #   # # # # # # # # #   # # # # #
     #       #   #               #   #       #
     #       # # #               # # #       #
     #                                       #
 # # # # #                               # # # # #
 #       #                               #       #
 # # # # #                               # # # # #
     #                                       #
     #       # # #               # # #       #
     #       #   #               #   #       #
     # # # # #   # # # # # # # # #   # # # # #
             #   #       #       #   #
             # # #       #       # # #
                         #
                     # # # # #
                     #       #
                     # # # # #
                         #
                         #
                         #
                         #
                         #
                         #
                         #
                     # # # # #
                     #       #
                     # # # # #
                         #
                         #
                         #
                         #
./fractal_turtle
Initial characters (F, f, -, +): F-F-F-F
Rewriting rule for 'F': FF+F-F-FF-F-F-fFF
Rewriting rule for 'f': f
Number of times to apply the rewriting rules: 1
Rewrite 0: F-F-F-F
Rewrite 1: FF+F-F-FF-F-F-fFF-FF+F-F-FF-F-F-fFF-FF+F-F-FF-F-F-fFF-FF+F-F-FF-F-F-fFF
             # # #
             #   #
     # # # # #   # # # # #
     #       #   #       #
     #       # # #       #
     #                   #
 # # # # #           # # # # #
 #       #           #       #
 # # # # #           # # # # #
     #                   #
     #       # # #       #
     #       #   #       #
     # # # # #   # # # # #
             #   #
             # # #
dcc fractal_turtle.c -o fractal_turtle
./fractal_turtle
Initial characters (F, f, -, +): F
Rewriting rule for 'F': F+F-F-F+F
Rewriting rule for 'f': f
Number of times to apply the rewriting rules: 1
Rewrite 0: F
Rewrite 1: F+F-F-F+F
     #
     #
 # # #
 #
 # # #
     #
     #
./fractal_turtle
Initial characters (F, f, -, +): F
Rewriting rule for 'F': F+F-F-F+F
Rewriting rule for 'f': f
Number of times to apply the rewriting rules: 2
Rewrite 0: F
Rewrite 1: F+F-F-F+F
Rewrite 2: F+F-F-F+F+F+F-F-F+F-F+F-F-F+F-F+F-F-F+F+F+F-F-F+F
                 #
                 #
             # # #
             #
         # # # # #
         #   #   #
     # # #   # # #
     #
 # # #
 #
 # # #
     #
     # # #   # # #
         #   #   #
         # # # # #
             #
             # # #
                 #
                 #
./fractal_turtle
Initial characters (F, f, -, +): F
Rewriting rule for 'F': F+F-F-F+F
Rewriting rule for 'f': f
Number of times to apply the rewriting rules: 3
Rewrite 0: F
Rewrite 1: F+F-F-F+F
Rewrite 2: F+F-F-F+F+F+F-F-F+F-F+F-F-F+F-F+F-F-F+F+F+F-F-F+F
Rewrite 3: F+F-F-F+F+F+F-F-F+F-F+F-F-F+F-F+F-F-F+F+F+F-F-F+F+F+F-F-F+F+F+F-F-F+F-F+F-F-F+F-F+F-F-F+F+F+F-F-F+F-F+F-F-F+F+F+F-F-F+F-F+F-F-F+F-F+F-F-F+F+F+F-F-F+F-F+F-F-F+F+F+F-F-F+F-F+F-F-F+F-F+F-F-F+F+F+F-F-F+F+F+F-F-F+F+F+F-F-F+F-F+F-F-F+F-F+F-F-F+F+F+F-F-F+F
                                                     #
                                                     #
                                                 # # #
                                                 #
                                             # # # # #
                                             #   #   #
                                         # # #   # # #
                                         #
                                     # # #
                                     #
                                 # # # # #
                                 #   #   #
                             # # #   # # # # #   # # #
                             #           #   #   #   #
                         # # #           # # # # # # #
                         #                   #   #
                     # # # # #           # # # # # # #
                     #   #   #           #   #   #   #
                 # # #   # # #           # # #   # # #
                 #
             # # #
             #
         # # # # #
         #   #   #
     # # #   # # #
     #
 # # #
 #
 # # #
     #
     # # #   # # #
         #   #   #
         # # # # #
             #
             # # #
                 #
                 # # #   # # #           # # #   # # #
                     #   #   #           #   #   #   #
                     # # # # #           # # # # # # #
                         #                   #   #
                         # # #           # # # # # # #
                             #           #   #   #   #
                             # # #   # # # # #   # # #
                                 #   #   #
                                 # # # # #
                                     #
                                     # # #
                                         #
                                         # # #   # # #
                                             #   #   #
                                             # # # # #
                                                 #
                                                 # # #
                                                     #
                                                     #
dcc fractal_turtle.c -o fractal_turtle
./fractal_turtle
Initial characters (F, f, -, +): F-F-F-F
Rewriting rule for 'F': FF-F-F-F-FF
Rewriting rule for 'f': f
Number of times to apply the rewriting rules: 2
Rewrite 0: F-F-F-F
Rewrite 1: FF-F-F-F-FF-FF-F-F-F-FF-FF-F-F-F-FF-FF-F-F-F-FF
Rewrite 2: FF-F-F-F-FFFF-F-F-F-FF-FF-F-F-F-FF-FF-F-F-F-FF-FF-F-F-F-FF-FF-F-F-F-FFFF-F-F-F-FF-FF-F-F-F-FFFF-F-F-F-FF-FF-F-F-F-FF-FF-F-F-F-FF-FF-F-F-F-FF-FF-F-F-F-FFFF-F-F-F-FF-FF-F-F-F-FFFF-F-F-F-FF-FF-F-F-F-FF-FF-F-F-F-FF-FF-F-F-F-FF-FF-F-F-F-FFFF-F-F-F-FF-FF-F-F-F-FFFF-F-F-F-FF-FF-F-F-F-FF-FF-F-F-F-FF-FF-F-F-F-FF-FF-F-F-F-FFFF-F-F-F-FF
 # # # # # # # # # # # # # # # # # # #
 #   #   #   #   #   #   #   #   #   #
 # # # # #   # # # # # # #   # # # # #
 #   #       #   #   #   #       #   #
 # # #       # # # # # # #       # # #
 #           #   #   #   #           #
 # # # # # # # # # # # # # # # # # # #
 #   #   #   #           #   #   #   #
 # # # # # # #           # # # # # # #
 #   #   #   #           #   #   #   #
 # # # # # # #           # # # # # # #
 #   #   #   #           #   #   #   #
 # # # # # # # # # # # # # # # # # # #
 #           #   #   #   #           #
 # # #       # # # # # # #       # # #
 #   #       #   #   #   #       #   #
 # # # # #   # # # # # # #   # # # # #
 #   #   #   #   #   #   #   #   #   #
 # # # # # # # # # # # # # # # # # # #
./fractal_turtle
Initial characters (F, f, -, +): F-F-F-F
Rewriting rule for 'F': FF-F--F-F
Rewriting rule for 'f': f
Number of times to apply the rewriting rules: 2
Rewrite 0: F-F-F-F
Rewrite 1: FF-F--F-F-FF-F--F-F-FF-F--F-F-FF-F--F-F
Rewrite 2: FF-F--F-FFF-F--F-F-FF-F--F-F--FF-F--F-F-FF-F--F-F-FF-F--F-FFF-F--F-F-FF-F--F-F--FF-F--F-F-FF-F--F-F-FF-F--F-FFF-F--F-F-FF-F--F-F--FF-F--F-F-FF-F--F-F-FF-F--F-FFF-F--F-F-FF-F--F-F--FF-F--F-F-FF-F--F-F
 # # # # # # # # # # # # # # # # # # #
 #       #           #   #       #   #
 # # #   #           #   # # #   #   #
 #                       #           #
 #   #               # # #       # # #
 #   #                   #           #
 # # # # # # #           #           #
 #       #                           #
 # # #   #                           #
 #                                   #
 #                           #   # # #
 #                           #       #
 #           #           # # # # # # #
 #           #                   #   #
 # # #       # # #               #   #
 #           #                       #
 #   #   # # #   #           #   # # #
 #   #       #   #           #       #
 # # # # # # # # # # # # # # # # # # #
./fractal_turtle
Initial characters (F, f, -, +): F
Rewriting rule for 'F': FF-F--F-F
Rewriting rule for 'f': f
Number of times to apply the rewriting rules: 3
Rewrite 0: F
Rewrite 1: FF-F--F-F
Rewrite 2: FF-F--F-FFF-F--F-F-FF-F--F-F--FF-F--F-F-FF-F--F-F
Rewrite 3: FF-F--F-FFF-F--F-F-FF-F--F-F--FF-F--F-F-FF-F--F-FFF-F--F-FFF-F--F-F-FF-F--F-F--FF-F--F-F-FF-F--F-F-FF-F--F-FFF-F--F-F-FF-F--F-F--FF-F--F-F-FF-F--F-F--FF-F--F-FFF-F--F-F-FF-F--F-F--FF-F--F-F-FF-F--F-F-FF-F--F-FFF-F--F-F-FF-F--F-F--FF-F--F-F-FF-F--F-F
 #
 #
 # # #
 #
 #   #
 #   #
 # # # # # # #
 #       #
 # # #   #
 #
 #
 #
 #           #
 #           #
 # # #       # # #
 #           #
 #   #   # # #   #           #
 #   #       #   #           #
 # # # # # # # # # # # # # # # # # # #
 #       #           #   #       #
 # # #   #           #   # # #   #
 #                       #
 #   #               # # #
 #   #                   #
 # # # # # # #           #
 #       #
 # # #   #
 #
 #
 #
 #
 #
 # # #
 #
 #
 #
 #
 #
 # # #
 #
 #   #
 #   #
 # # # # # # #
 #       #
 # # #   #
 #
 #
 #
 #
 #
 # # #
 #
 #
 #
 #
./fractal_turtle
Initial characters (F, f, -, +): F+F+F+F
Rewriting rule for 'F': F+f-FF+F+FF+Ff+FF-f+FF-F-FF-Ff-FFF
Rewriting rule for 'f': ffffff
Number of times to apply the rewriting rules: 1
Rewrite 0: F+F+F+F
Rewrite 1: F+f-FF+F+FF+Ff+FF-f+FF-F-FF-Ff-FFF+F+f-FF+F+FF+Ff+FF-f+FF-F-FF-Ff-FFF+F+f-FF+F+FF+Ff+FF-f+FF-F-FF-Ff-FFF+F+f-FF+F+FF+Ff+FF-f+FF-F-FF-Ff-FFF
             # # # # #
             #       #
             # # # # #

         # # # # # # # # # # # # #
         #                       #
         #   # # #   # # # # #   #   # # #
         #   #   #   #       #   #   #   #
         #   #   #   # # # # #   #   #   #
         #   #   #               #   #   #
 # # #   #   # # #       # # #   #   # # #
 #   #   #               #   #   #
 #   #   #   # # # # #   #   #   #
 #   #   #   #       #   #   #   #
 # # #   #   # # # # #   # # #   #
         #                       #
         # # # # # # # # # # # # #

                     # # # # #
                     #       #
                     # # # # #
Assumptions/Restrictions/Clarifications
-
Use of the following C language features is not permitted for this activity:
- Two-dimensional arrays.
- Variable-length arrays.
- Dynamically allocated memory e.g. any use of
malloc().
-
There is no predefined limit or maximum size (number of rows or columns) required to output the turtle interpretation. Your program should be able to handle arbitrarily large output sizes.
-
Every
'#'character is printed with a space' 'before it. In particular: note from the examples that a'#'character is never printed in the first column of output as it is always preceded by a space' '. -
The following inputs will contain
16384characters or less:- The sequence of initial letters.
- The rewriting rules.
- All rewritten sequences of characters.
-
The initial sequence of characters will never be empty.
-
It is possible for a rewriting rule to be empty e.g. to replace an
'f'with no characters at all. -
Your program must be able to handle all printable ASCII characters (decimal codes
32to126). This excludes any control characters (from0to31) and the delete character (127). -
The number of times to apply the rewriting rules will be a non-negative integer (zero is a valid input).
1091 style fractal_turtle.c
When you think your program is working,
you can use autotest
to run some simple automated tests:
1091 autotest fractal_turtle
Exercise — individual:
(Not For Marks) Splashkit

Welcome to our SplashKit activity page! Designed to ignite your creativity, these walkthroughs will guide you into the world of Graphical User Interfaces (GUIs) with ease.
With SplashKit, a toolkit tailored for beginners, you'll find GUI development both accessible and enjoyable. It simplifies the process of creating windows, drawing graphics, and managing user input, allowing you to focus on bringing your ideas to life.
Through the activities on this page, you'll gain hands-on experience with SplashKit, mastering the basics while building confidence in your programming skills.
Dive in, explore, and let your imagination guide you as you discover the exciting possibilities of GUI programming!
Are you ready to bring your C programs to life with colour, graphics, and interactivity?
This activity is the first in a series that will take your programs beyond printf() and the terminal.
SplashKit
Graphical User Interfaces (GUIs) allow programs to display graphics, text, buttons, and other dynamic elements in dedicated application windows.
SplashKit is a beginner-friendly toolkit that simplifies GUI development, making it easy to write programs that create windows, draw graphics, and handle user input with minimal setup.
Getting Started
Let's get everything set up so you can start coding with SplashKit:
- Create a Project Directory.
- Install SplashKit.
- Compile an Example File.
- Run the Example Program.
- Set up the VS Code Project.
1. Create a Project Directory
As you progress through these activities, you will be working with many files. Creating a folder for each activity is essential and will help to keep your files organised.
First, create a new directory to store all of your SplashKit projects and cd into it.
mkdir splashkit
cd splashkit
Similarly, create another new directory for your first project and cd into it.
mkdir getting_started
cd getting_started
2. Install SplashKit
From your getting_started directory, install SplashKit to your CSE account using:
1091 setup-splashkit splashkit_getting_started
SplashKit should now be installed.
Use the ls command to confirm that splashkit_examples.c has been copied to your getting_started directory.
3. Compile an Example File
Until now, we’ve used dcc to compile C code.
SplashKit projects require a different compiler called skm clang++.
Compile the splashkit_examples.c file using:
skm clang++ splashkit_example.c -o splashkit_example
If SplashKit was installed correctly, you will see this message:
🎉 clang++ command run successfully 🎉
Use the ls command to confirm that a file named splashkit_example exists in your getting_started directory
4. Run the Example Program
We run SplashKit programs the same way that we run our C programs.
Run the example program with the following command.
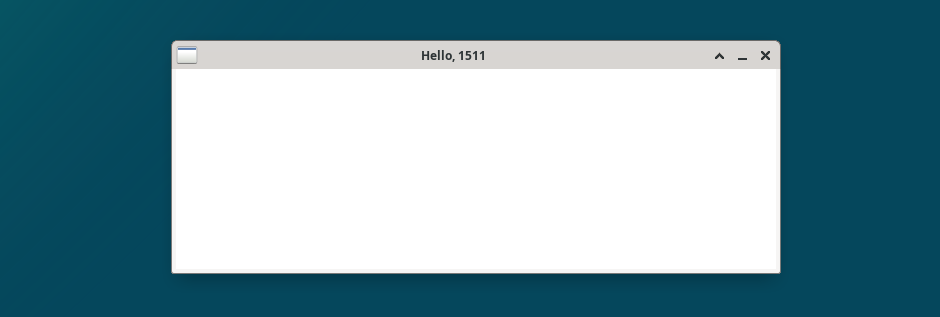
./splashkit_example
A window opens, displaying "Hello, SplashKit!", then closes after 5 seconds.
5. Set Up the VS Code Project
Use pwd to ensure that you're in the getting_started directory, then open it with code ..
VS Code lists your project files on the left (press Ctrl+B if it's missing).
Click on splashkit_example.c to open it:
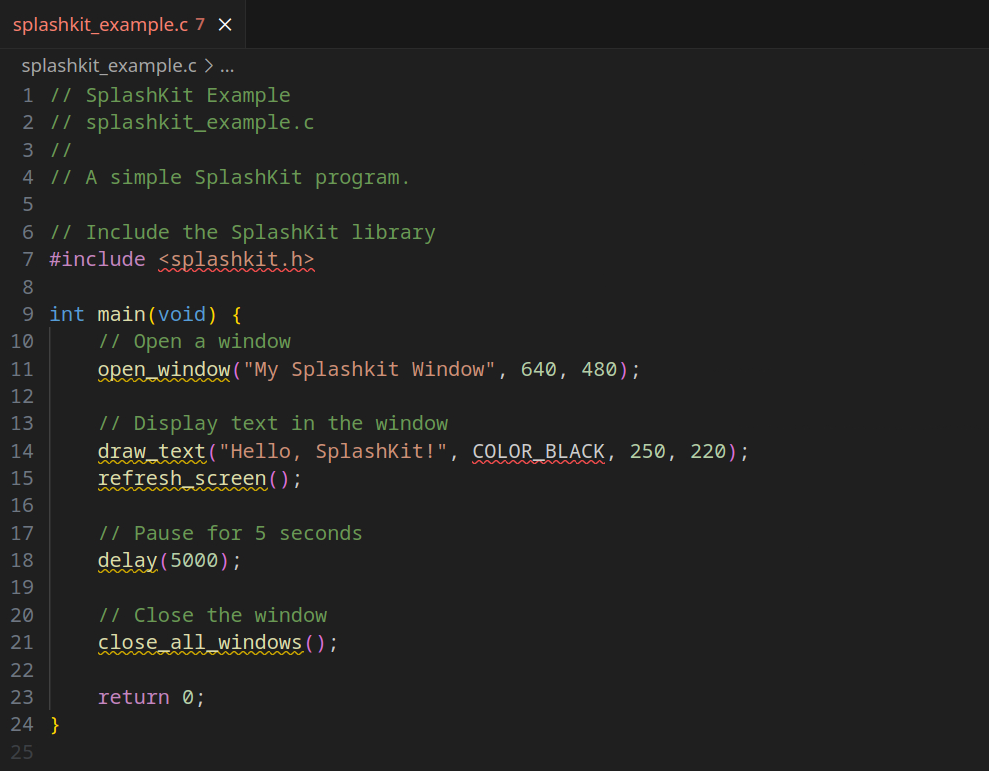
Notice anything strange? VS Code is highlighting errors on nearly every line!
This is because VS Code doesn't know about SplashKit.
Close VS Code and run the following command from inside your project directory:
1091 setup-splashkit-directory
Reopen the project with code . and the errors should be gone!
You will learn more about how the example code works in the upcoming SplashKit activities. For now, note the line #include <splashkit.h> at the top of the file. This is similar to #include <stdio> and it allows us to use the SplashKit toolkit in our code.
SplashKit Summary
We've covered a lot of material to get started. Here's what to remember:
- SplashKit is installed once with
1091 setup-splashkit splashkit_getting_started. - Create a separate directory for each SplashKit project.
- Set up each SplashKit directory with
1091 setup-splashkit-directory. - SplashKit projects are opened with
code .. - Compile SplashKit code with
skm clang++instead ofdcc. - Run SplashKit programs normally e.g.
./program_name.
In this activity, you will learn how to manage windows with SplashKit.
A window is a rectangular area on the screen where graphical programs display visual elements and interact with the user. Windows are everywhere. If you're viewing this in a browser (such as Firefox, Chrome, or Safari) then the browser is open in a window. Familiar applications such as VS Code, the terminal, and file managers (Finder on macOS, File Explorer on Windows) all open in their own windows.
Setting Up
Step 1. Navigate to your SplashKit directory (the one created during SplashKit #1 - Getting Started).
cd splashkit
Step 2. Create a new directory for this activity and cd into it.
mkdir windows
cd windows
Step 3. Set up the windows directory.
1091 setup-splashkit-directory
Step 4.
Download splashkit_master.c here
Or, copy these file(s) to your CSE account using the following command:
1091 fetch-activity splashkit_master
Step 5. Open the SplashKit project directory in VS Code.
code .
SplashKit Windows
SplashKit includes a windows library that allows programs to open and close windows. Opening a window gives your program a dedicated space to display graphics and receive user input, while closing it is crucial for freeing up resources and providing a clear way for users to exit.
To use SplashKit's libraries add #include <splashkit.h> near the top of a .c file.
Once you do this, you have a starting point for all of your SplashKit programs:
#include <splashkit.h>

int main(void) {
    // we will be adding more code here

    return 0;
}
Opening Windows
SplashKit's open_window() function creates a new window and displays it on the screen.
window open_window(string caption, int width, int height);
The following statement opens a window titled "My Window" with a width and height
of 800 and 600 pixels respectively.
open_window("My Window", 800, 600);
Delay/Wait
Imagine you want to show a quick welcome message or instructions on the screen, but you don't want the program to instantly jump to the next step. By pausing for a couple of seconds you give the user time to understand what's being shown before continuing.
SplashKit provides a delay() function. Calling this will pause our program
for a specified amount of time.
void delay(int milliseconds);
For example:
delay(7000);
This pauses program execution for 7 seconds (7000 milliseconds) before continuing.
Closing Windows
When you're finished with the window, you can close it with close_all_windows().
void close_all_windows(void);
We call this function with no arguments:
close_all_windows();
Putting It All Together
Combining these operations yields a short program:
#include <splashkit.h>

int main(void) {
    open_window("My Window", 800, 600);
    delay(7000);
    close_all_windows();

    return 0;
}
This program:
- Opens a window titled "My Window" width and height of
800and600pixels respectively. - Pauses program execution for
7seconds, keeping the window open. - Closes the window before exiting.
Code Demo
#include <splashkit.h>

#define WIDTH 400
#define HEIGHT 240
#define DELAY_DURATION 4000

int main(void) {
    // window open_window(string caption, int width, int height);
    // Open a window of width 640 pixels and height 480 pixels
    open_window("My First Window", 640, 480);

    // void delay(int milliseconds);
    // Wait two seconds (2000 milliseconds)
    delay(2000);

    // void close_all_windows(void);
    // Close the window
    close_all_windows();

    // Open a second window, this time using #defined constants
    open_window("My Second Window", WIDTH, HEIGHT);
    delay(DELAY_DURATION);
    close_all_windows();

    // Open a third window, this time using variables as arguments
    int width = 960;
    int height = 360;
    int duration = 3000;
    open_window("My Third Window", width, height);
    delay(duration);
    close_all_windows();

    return 0;
}
Activity
Now you have a chance to practice what you've learned!
Create a program splashkit_windows.c. It should:
- Prompt the user for a width.
- Prompt the user for a height.
- Prompt the user for a duration.
- Open a window of the given size.
- Wait for the specified duration, keeping the window open.
- Close the window.
Examples
Example 1: Opening a 400×300 Window for 5 Seconds
skm clang++ splashkit_master.c -o splashkit_master
./splashkit_master
Enter a window width (pixels): 400
Enter a window height (pixels): 300
Enter a duration (seconds): 5
After the user enters these values, a window should appear as shown below and automatically close after 5 seconds.

Example 2: Opening a 600×200 Window for 12 Seconds
skm clang++ splashkit_master.c -o splashkit_master
./splashkit_master
Enter a window width (pixels): 600
Enter a window height (pixels): 200
Enter a duration (seconds): 12
After the user enters these values, a window should appear as shown below and automatically close after 12 seconds.
Assumptions/Restrictions/Clarifications
- There are no autotests for this activity.
Summary
In this activity, you learned how to work with three functions to manage windows:
open_window(caption, width, height)- Opens a new window on the screen.delay(milliseconds)- Pauses program execution.close_all_windows()- Closes all windows.
List of New Functions
At the end of each activity, you'll find a list of all new function prototypes.
Keeping a list of these functions as you progress will be useful for whenever you need a quick refresher.
// Window Management
window open_window(string caption, int width, int height);
void close_all_windows(void);

// Program Control
void delay(int milliseconds);
Welcome to the c o l o u r f u l world of SplashKit!
In this activity, you'll discover how colours are used in SplashKit to make your programs bright and visually appealing.
With an understanding of colours, you will be able to control how shapes and text appear when displayed by your program. You'll learn:
- How colours are represented in SplashKit.
- How to use some fun, built-in colours.
- How to create your very own custom colours using RGB values.
Setting Up
Step 1. Navigate to your SplashKit directory (the one created during SplashKit #1 - Getting Started).
cd splashkit
Step 2. Create a new directory for this activity and cd into it.
mkdir colours
cd colours
Step 3. Set up the colours directory.
1091 setup-splashkit-directory
Step 4.
Download splashkit_master.c here
Or, copy these file(s) to your CSE account using the following command:
1091 fetch-activity splashkit_master
Step 5. Open the SplashKit project directory in VS Code.
code .
SplashKit Colours
SplashKit provides a color library that includes:
- 144 built-in preset colours.
- Functions to define over 16 million custom colours.
- A
colordata type to store our colours as variables.
Our starter code is a familiar program from SplashKit #2 - Windows.
Copy this into a file named playground.c. Then, you can use this "playground" to experiment with colours as you progress through this activity.
#include <splashkit.h>

int main(void) {
    open_window("My Window", 800, 600);

    // TODO: we will add code here

    delay(2000);

    close_all_windows();
    return 0;
}
This program:
- Opens a window with a default (white) background.
- Pauses for 2 seconds.
- Closes the window and exits.
Compile and run it with:
skm clang++ playground.c -o playground
./playground
Clear and Refresh
To explore SplashKit's colours, we'll be changing the background colour of our window.
When you call clear_screen(), SplashKit changes the window's background to the colour you specify.
For example, the following statement clears our window and paints the background black:
clear_screen(COLOR_BLACK);
Note that calling clear_screen() alone won't display the new colour right away. SplashKit waits until you call refresh_screen() before showing any changes. So to make the update visible, follow the clear_screen() call with:
refresh_screen();
Calling refresh_screen() applies all pending updates to the window, allowing you to see your changes.
In later activities, you will be drawing shapes, text, and images on the window. Whether you're clearing the background or adding new elements, changes will not appear on the window until you call refresh_screen(). This function applies all pending updates since the last refresh, making your changes visible on the window.
To see how clear_screen() and refresh_screen() work together, try this program in your playground.c file. What does the program do if refresh_screen() isn't called? Try it and see!
#include <splashkit.h>

int main(void) {
    open_window("Clear and Refresh", 800, 600);
    delay(2000);

    // Clear the window and colour it black.
    clear_screen(COLOR_BLACK);
    // Refresh the screen to display our changes.
    refresh_screen();
    // Pause the program for 2 seconds.
    delay(2000);

    close_all_windows();
    return 0;
}
This program:
- Opens a window with a default (white) background.
- Pauses for 2 seconds.
- Calls
clear_screen(COLOR_BLACK)to paint the window black. - Calls
refresh_screen()to update the window with the changes fromclear_screen(). - Pauses for 2 seconds.
- Closes the window and exits.
Preset Colours
We're not limited to COLOR_BLACK. SplashKit provides 144 built-in presets!
Here are a few to choose from:
- COLOR_ORANGE_RED
- COLOR_DEEP_SKY_BLUE
- COLOR_PURPLE
- COLOR_DARK_TURQUOISE
These values are like #defined constants, but for colours. Whenever a SplashKit function expects a colour parameter, we can use these as arguments. For example, we could call clear_screen() with:
clear_screen(COLOR_ORANGE_RED);clear_screen(COLOR_PURPLE);clear_screen(COLOR_DARK_TURQUOISE);
To see how different colour presets can be used, run this program in your playground.c file.
#include <splashkit.h>

#define DELAY_DURATION 2000

int main(void) {
    open_window("Using Preset Colours", 640, 480);

    // Black
    clear_screen(COLOR_BLACK);
    refresh_screen();
    delay(DELAY_DURATION);

    // Orange Red
    clear_screen(COLOR_ORANGE_RED);
    refresh_screen();
    delay(DELAY_DURATION);

    // Sky Blue
    clear_screen(COLOR_DEEP_SKY_BLUE);
    refresh_screen();
    delay(DELAY_DURATION);

    // Purple
    clear_screen(COLOR_PURPLE);
    refresh_screen();
    delay(DELAY_DURATION);

    // Dark Turquoise
    clear_screen(COLOR_DARK_TURQUOISE);
    refresh_screen();
    delay(DELAY_DURATION);

    close_all_windows();
    return 0;
}
This program:
- Opens a window with a default (white) background.
- Pauses for 2 seconds.
- Colours the window BLACK
- Pauses for 2 seconds.
- Colours the window ORANGE_RED
- Pauses for 2 seconds.
- Colours the window DEEP_SKY_BLUE
- Pauses for 2 seconds.
- Colours the window PURPLE
- Pauses for 2 seconds.
- Colours the window DARK_TURQUOISE
- Pauses for 2 seconds.
- Closes the window and exits.
For more preset colours:
- Visit SplashKit's Colour Generator.
- Scroll down to the Colour Palette.
- Click on a colour.
- The name will appear below.

In the example above, the selected colour is COLOR_MEDIUM_BLUE.
The color Data Type
SplashKit provides a custom data type called color. Just like an int holds a number, a color holds a colour.
For example, you can assign a preset colour to a variable and pass it around your program:
color my_colour = COLOR_BLACK;
clear_screen(my_colour);
refresh_screen();
This code snippet:
- Declares a
colorvariable namedmy_colour. - Assigns it the value
COLOR_BLACK. - Uses
my_colourto paint the window black. - Calls
refresh_screen()to display the change of colour.
Custom Colours
If the preset colours aren't enough, SplashKit gives you full control to construct over 16 million unique colours with an RGB colour model.
You can create colours by specifying how much of each colour component (red, green, and blue) to mix together. By mixing different amounts, you can produce just about any colour you can think of.
Each component can be assigned a value from 0 to 255 where:
- 0 means "none of that colour".
- 255 means "as much of that colour as possible".
These components are mixed with the rgb_color() function
color rgb_color(int red, int green, int blue);
which takes in three int values, one for each colour component, and returns a variable of type color.
Primary RGB Colours: Red, Green, Blue
These examples demonstrate how setting one component to its maximum value (255) while keeping the others at 0 results in the primary colours of the RGB colour model.
color red
= rgb_color(255,
0,
0);
color green
= rgb_color(0,
255,
0);
color blue
= rgb_color(0,
0,
255);
Any Colour You Like
Experiment with different values in rgb_color() to invent your own unique shades!
Here are four extra colours to spark your creativity.
color sea_green
= rgb_color(102,
194,
165);
color apricot_orange
= rgb_color(252,
141,
98);
color wisteria_blue
= rgb_color(141,
160,
203);
color orchid_purple
= rgb_color(231,
138,
195);
Colours For All
Approximately 4-5% of the population lives with a Colour Vision Deficiency that affects how they perceive and distinguish colours. Although no single colour palette ensures universal accessibility, using a palette such as Okabe-Ito (below) can help make colous more enjoyable for all users.
color black
= rgb_color(0,
0,
0);
color orange
= rgb_color(230,
159,
0);
color sky_blue
= rgb_color(86,
180,
233);
color bluish_green
= rgb_color(0,
158,
115);
color yellow
= rgb_color(240,
228,
66);
color blue
= rgb_color(0,
114,
178);
color vermillion
= rgb_color(213,
94,
0);
color reddish_purple
= rgb_color(204,
121,
167);
Black, White, and Grey
A colour appears as a shade of grey when all three RGB components have the same value.
color black
= rgb_color(0,
0,
0);
color darkgrey
= rgb_color(63,
63,
63);
color grey
= rgb_color(127,
127,
127);
color lightgrey
= rgb_color(181,
181,
181);
color white
= rgb_color(255,
255,
255);
To see how custom colours can be used, test this program in playground.c.
#include <splashkit.h>

#define DELAY_DURATION 2000

int main(void) {
    open_window("RGB Colours", 640, 480);

    color deep_blue  = rgb_color(  0, 114, 178);
    color vermillion = rgb_color(213,  94,   0);
    color blue_green = rgb_color(  0, 158, 115);
    color yellow     = rgb_color(240, 228,  66);

    // Deep Blue
    clear_screen(deep_blue);
    refresh_screen();
    delay(DELAY_DURATION);

    // Vermillion
    clear_screen(vermillion);
    refresh_screen();
    delay(DELAY_DURATION);

    // Blue Green
    clear_screen(blue_green);
    refresh_screen();
    delay(DELAY_DURATION);

    // Yellow
    clear_screen(yellow);
    refresh_screen();
    delay(DELAY_DURATION);

    close_all_windows();
    return 0;
}
This program:
- Opens a window with a default (white) background.
- Defines five custom colours with
rgb_color()and assigns them to the variablesdeep_blue,vermillion,blue_green, andyellow. - Displays each colour on the screen for 2 seconds.
- Closes the window and exits.
For more custom colours:
- Visit SplashKit's Colour Generator.
- Scroll down to the Colour Generator.
- Set values for red, green, and blue.
- Preview the RGB colour.

In the example above, the warm orange colour can be assigned to a variable with:
color warm_orange = rgb_color(255, 183, 77);
Activity
Create a program splashkit_colours.c. It should:
- Prompt the user for a red value from 0 to 255.
- Prompt the user for a green value 0 to 255.
- Prompt the user for a blue value 0 to 255.
- Open a window 960 pixels wide and 360 pixels in height.
- Display the corresponding RGB colour for 5 seconds.
- Close the window.
Examples
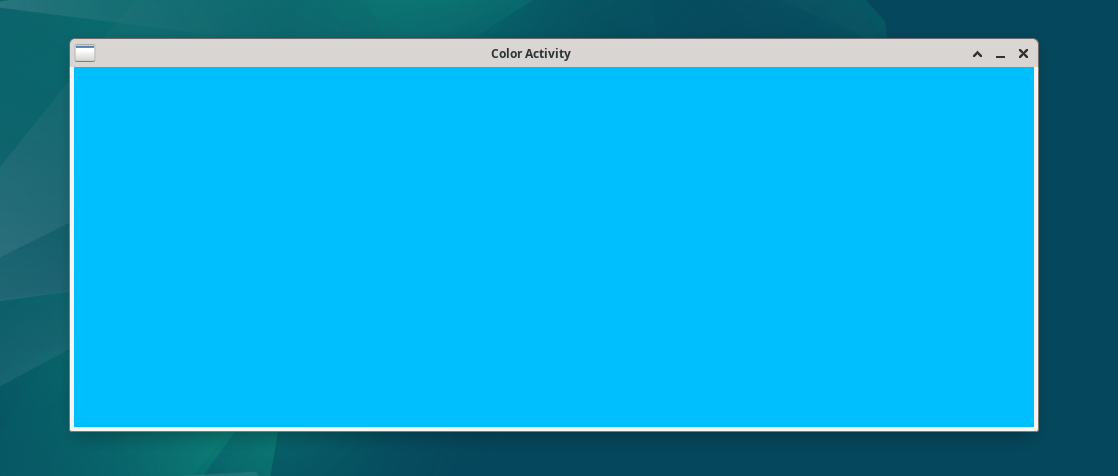
skm clang++ splashkit_master.c -o splashkit_master
./splashkit_master
Enter a RED value (from 0 to 255): 0
Enter a GREEN value (from 0 to 255): 191
Enter a BLUE value (from 0 to 255): 255
After the user enters these values, a window should appear as shown below, displaying a deep sky blue colour for 5 seconds before closing.
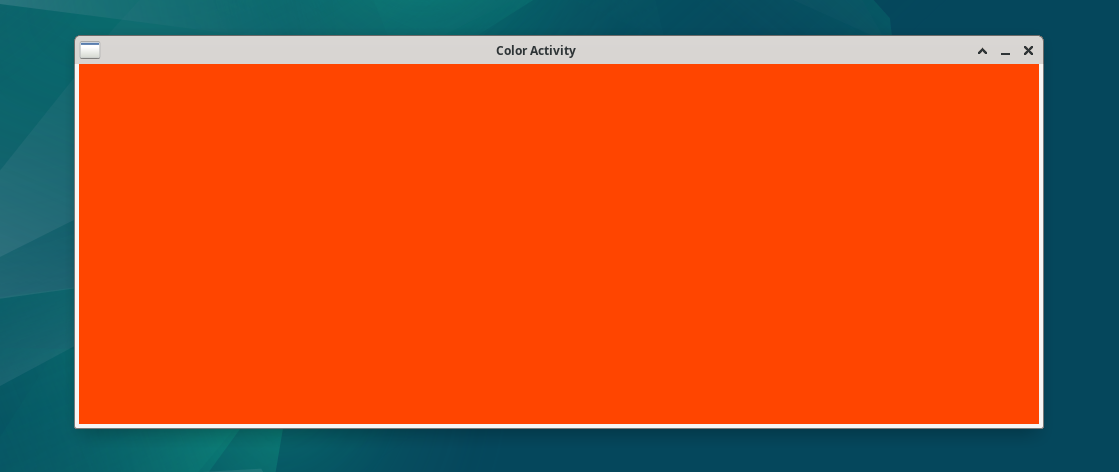
skm clang++ splashkit_master.c -o splashkit_master
./splashkit_master
Enter a RED value (from 0 to 255): 255
Enter a GREEN value (from 0 to 255): 69
Enter a BLUE value (from 0 to 255): 0
Similarly, a window should appear as shown below, displaying an orange red colour for 5 seconds before closing.
Assumptions/Restrictions/Clarifications
- There are no autotests for this activity.
Summary
In this activity, you learned how to work with three functions to manage colours:
clear_screen(color)- Clears the window and changes the background colour.refresh_screen()- Applies changes to display them on the window.rgb_color(red, green, blue)- Creates a colour from RGB components.
Types and Functions
// Screen Management
void clear_screen(color clr);
void refresh_screen(void);

// Colours
color rgb_color(int red, int green, int blue);

// Okabe-Ito Accessible Colour Palette
color black          = rgb_color(  0,   0,   0);
color orange         = rgb_color(230, 159,   0);
color sky_blue       = rgb_color( 86, 180, 233);
color bluish_green   = rgb_color(  0, 158, 115);
color yellow         = rgb_color(240, 228,  66);
color blue           = rgb_color(  0, 114, 178);
color vermillion     = rgb_color(213,  94,   0);
color reddish_purple = rgb_color(204, 121, 167);
// Window Management
window open_window(string caption, int width, int height);
void close_all_windows(void);

// Program Control
void delay(int milliseconds);

// Screen Management
void clear_screen(color clr);
void refresh_screen(void);

// Colours
color rgb_color(int red, int green, int blue);

// Okabe-Ito Accessible Colour Palette
color black          = rgb_color(  0,   0,   0);
color orange         = rgb_color(230, 159,   0);
color sky_blue       = rgb_color( 86, 180, 233);
color bluish_green   = rgb_color(  0, 158, 115);
color yellow         = rgb_color(240, 228,  66);
color blue           = rgb_color(  0, 114, 178);
color vermillion     = rgb_color(213,  94,   0);
color reddish_purple = rgb_color(204, 121, 167);
In-Class Exercise — group:
Presentation
This week during lab class, you will be divided into small groups and assigned an activity from this week to give a short presentation on (2–5 minutes per group).
There is no give or autotest for the group presentation.
Submission
give.
You can run give multiple times.
Only your last submission will be marked.
Don't submit any exercises you haven't attempted.
If you are working at home, you may find it more convenient to upload your work via give's web interface.
Remember you have until Week 5 Monday 9:00am to submit your work.
You cannot obtain marks by e-mailing your code to tutors or lecturers.
You check the files you have submitted here.
Automarking will be run by the lecturer several days after the submission deadline,
using test cases different to those autotest runs for you.
(Hint: do your own testing as well as running autotest.)
After automarking is run by the lecturer you can view your results here. The resulting mark will also be available via give's web interface.
Lab Marks
When all components of a lab are automarked you should be able to view the the marks via give's web interface or by running this command on a CSE machine:
1091 classrun -sturec
Voice of the Student
✨ Help Us Improve Your Learning Experience ✨
Your feedback helps us understand what’s working well and what might need improvement.
This quick, anonymous check-in has just two questions and takes less than a minute to complete.
Please answer honestly — your input makes a real difference.