🪟 Windows SetupPublic
Setting up your local development environment for Java on Windows.
Warning
- This guide is for local setup. If you are working on CSE, you do not need to follow this.
- It is recommended to setup development locally in-case you need to use it.
- This guide does not support ARM based Windows Machines.
1. Installing Java JDK 17 On Your Machine
Warning
It is important that you install exactly Java JDK version 17.x on your machine.
This is how we will be compiling and testing your code.
Ensure that you do not have younger or older versions of Java JDK on your machine. If you do, you will need to uninstall or setup your paths correctly.
You can check if you have a previous version of Java installed by opening a terminal and running the following command:
java --version1.1. Adoptium Java JDK 17 Installation
Navigate to Latest Releases | Adoptium in your browser, and download the .msi file for your architecture and Windows OS.
Tip
Warning
JDK version, not JRE.Open the .msi file you downloaded and follow the prompts to install Java.
You can verify the installation succeeded by checking the version using the command:
You may need to close all terminals you have open, and open a new one for the command to work
java --versionThe output should look like the following (doesn’t need to be identical. Most importantly needs to show Java 17)
openjdk 17.0.9 2023-10-17
OpenJDK Runtime Environment Temurin-17.0.9+9 (build 17.0.9+9)
OpenJDK Client VM Temurin-17.0.9+9 (build 17.0.9+9, mixed mode, emulated-client)
2. Gradle 8.8 Installation
Warning
It is important you install exactly Gradle 8.8.
- Download the Gradle zip file from here.
- Create a new directory
C:\Gradlewith File Explorer.
You can choose to pick a different directory. In this case, replace all instances of
C:\Gradlewith your chosen directory.
- Unzip the contents of the Gradle zip file and copy the contents of the
gradle-8.8folder into the directoryC:\Gradle
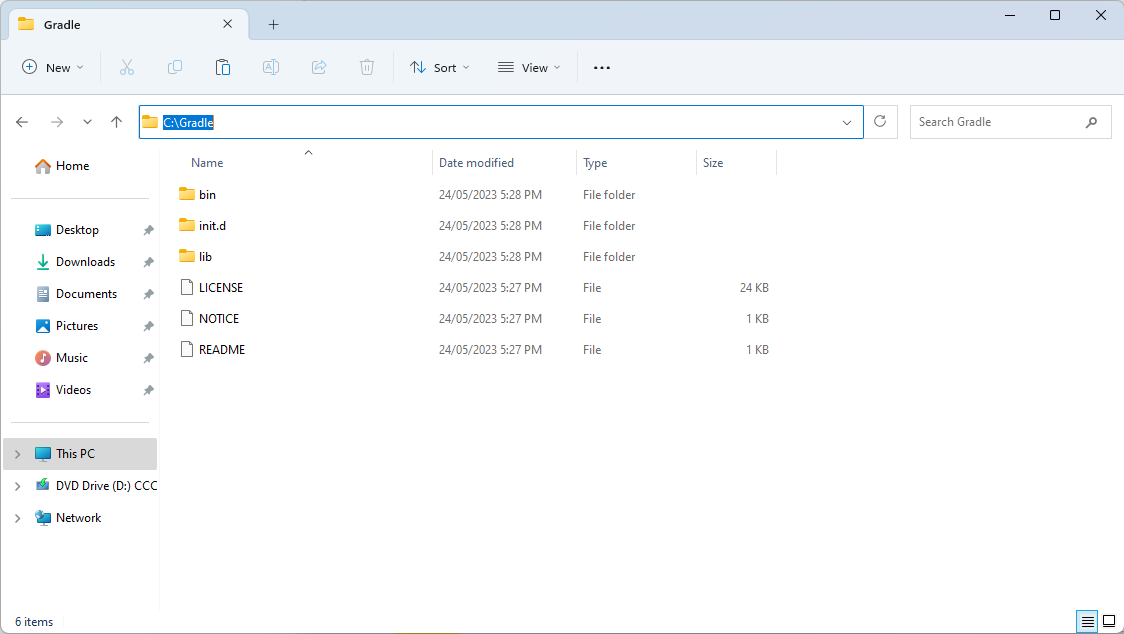
C:\Gradle folder contents after Step 3
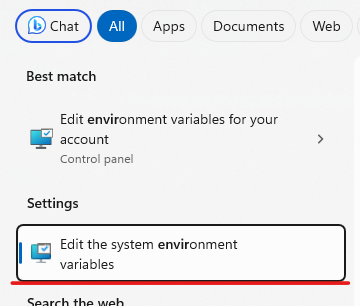
- Search and open up
Edit the system environment variables. There are two very similar options. Ensure you pick the matching name (highlighted red in the image below).
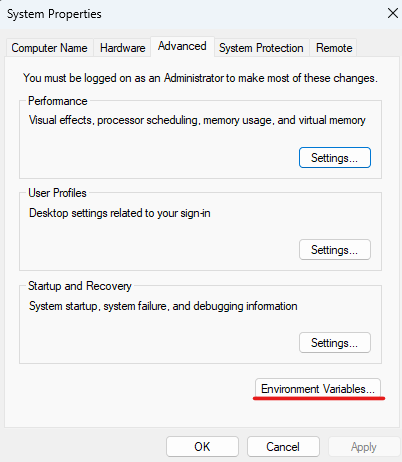
- Click on
Environment Variables. This should open another pop-up.
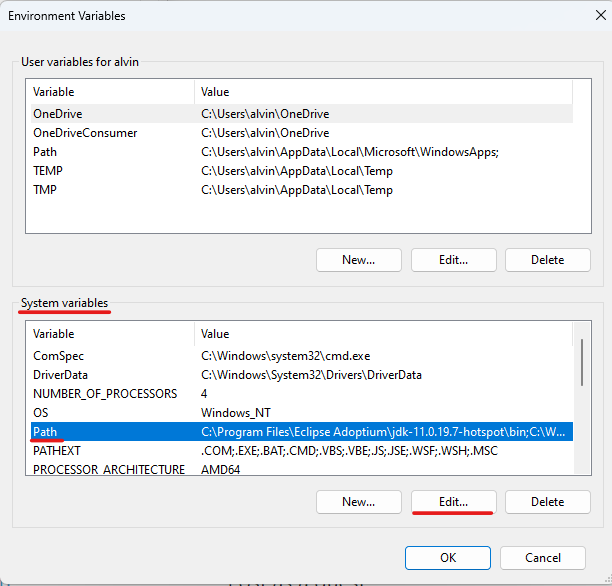
- Under
System variables, selectPathand clickEdit.
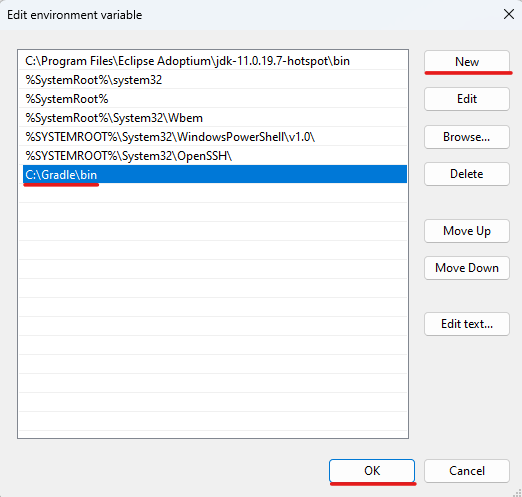
- Click New and add a new entry called
C:\Gradle\bin. Then clickOKto close the current pop-up, andOKagain to close the Environment Variables pop-up.
- Close all open terminals.
- Verify installation by opening a terminal (Powershell or Command Prompt) and running:
gradle --versionThe following output is expected:
------------------------------------------------------------
Gradle 8.8
------------------------------------------------------------

Build time:   2024-05-31 21:46:56 UTC
Revision:     4bd1b3d3fc3f31db5a26eecb416a165b8cc36082

Kotlin:       1.9.20
Groovy:       3.0.17
Ant:          Apache Ant(TM) version 1.10.13 compiled on January 4 2023
JVM:          17.0.9 (Eclipse Adoptium 17.0.9+9)
OS:           Windows 11 10.0 x86
The most important things to note are Gradle 8.8 and JVM: 17.x.y.
If some of your terminals are not detecting
gradle(such as terminals inside VSCode), restart your computer and try again.
Last updated on