Assignment 2: Awesome Image Format
Contents
- Getting Started
- Background
- AIF (Amazing Image Format) Format
- Stage 0
- Stage 1
- Stage 2
- Stage 3
- Stage 4
- Stage 5
- Reference Implementation
- Handling Errors
Getting started
In this assignment you will implement a program to manipulate AIF (Amazing Image Format) files.
Create a new directory for this assignment, change to this directory, and fetch the provided code by running
mkdir -m 700 aif
cd aif
1521 fetch aif
If you're not working at CSE, you can download the provided files as a zip file or a tar file.
This will give you the following files:
aif-tools.c- is the only file you need to change: it contains partial definitions of four functions, stage1_info, stage2_brighten, stage3_convert_color, stage4_decompress, and stage5_compress, to which you need to add code to complete the assignment. You can also add your own functions to this file.
aif-tools_main.c- contains a main, which has code to parse the command line arguments, and which then calls one of stage1_info, stage2_brighten, stage3_convert_color, stage4_decompress, and stage5_compress, depending on the command line arguments given to aif-tools. Do not change this file.
-
aif.h - contains shared function declarations and some useful constant definitions. Do not change this file.
aif.mk- contains a Makefile fragment for aif.
You can run make(1) to compile the provided code into
into an executable file called aif-tools:
make
dcc   aif-tools.c aif-tools_main.c -o aif
./aif-tools
Usage: aif-tools  <info|brighten|compress > file1 [...  <file2 >]
You may optionally create extra .c or .h files.
If you create extra files, you must either modify the provided aif.mk fragment
or compile your code manually.
You can run 1521 aif-examples to get a directory
called aif-examples full of example .aif to test your
program with:
1521 aif-examples
You can run the reference solution with:
1521 aif-tools
Background
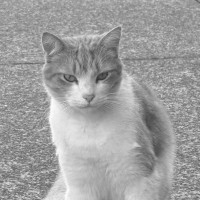
How computers display images

The same image at 200x200, 50x50 and 10x10 pixels.
Images, like a computer screen, is arranged into a grid of ‘pixels’. Each pixel is assigned a color value and by combining these pixels you can form an image. The more pixels the more defined the image may look.
When we refer to the width or the height of an image, we are generally referring to the number of pixels in each row and the number of pixels in each column. For example 640x500 means 640 columns and 500 rows of pixels.
Color Depth
As computers have developed they have been able to display images of increasing color depth. Color depth refers to the amount of bits used to represent color where more bits = a bigger range of color values.
The following 500x500 image at 8-bit rgb, 16 color (4-bit palette) and 4 color (2-bit palette) depths

Notice how at lower (250x250) resolutions the difference is more pronounced.

This is due to dithering where at a larger distance colors can merge together and combine!
Color Formats
In this assignment you only have to worry about two ways of storing color.
8-bit RGB
One of the most common color formats where each pixel is made up of 8-bits of red, green and blue and can be stored as a 24-bit value. Each pixel is 3 bytes. Each pixel will look like RR GG BB in memory.
By mixing red, green and blue we can make 2^24 different colors! For example FF FF FF is white, 00 00 00 is black, FF 00 00 would be a bright red and FF FF 00 would be a bright yellow!
Often web and graphic designers will work with colors in a hex format such as #ff00ff and these correspond to 8-bit RGB.
8-bit Grayscale
Each pixel is an 8-bit value where 0 is black, 255 is white and inbetween are shades of gray. Each pixel is 1 byte.
Storing Pixels
When working with images, pixels are generally stored in rows of color values. Each row will be the at least the width of the image.
AIF (Amazing Image Format) Format
Each aif file contains the information that makes up an image.
Every aif file consists of a header, followed by pixel data. The format of the header is:
| name | length | offset | type | description |
|---|---|---|---|---|
| magic number | 4 B | 0 B | characters sequence | The magic number for aif files, which is the sequence of bytes
0x41, 0x49, 0x46, 0x00 (ASCII string: "AIF\0").
|
| checksum | 2 B | 4 B | unsigned, 16-bit, little-endian | The checksum computed when the aif file was created. |
| pixel format | 1 B | 6 B | unsigned 8-bit value | The format used to store pixels. See pixel format. |
| compression | 1 B | 7 B | unsigned 8-bit value | The compression used to store the image. See compression. |
| width | 4 B | 8 B | unsigned, 32-bit, little-endian | The number of pixels (columns) in each row. |
| height | 4 B | 12 B | unsigned, 32-bit, little-endian | The to the number of rows. |
| pixel data offset | 4 B | 16 B | unsigned, 32-bit, little-endian | The offset (in bytes) from the start of the file where pixel data begins. |
aif.h.
Magic
Magic values are used to identify the format of a file and verify that the header
has not been corrupted. We use file extensions too
(e.g. png and jpg ), but magic fields allow a file format to be
identified even if this extension is missing or changed.
Checksum
The AIF format involves a simple checksum to make sure the image data is valid. A checksum is a value calculated from a larger piece of data (in our case an image) which can be used to check for corrupted data.
We use a simple Fletcher’s checksum to verify our image. Its calculation works as follows:
- We have two sums, sum1 and sum2 start at 0
- Assume the checksum value in the image header is 0
- Read in the first byte starting from the header
- Add the byte value to sum1 and take
sum1 % 256 - Add the new value for sum1 to sum2 and take
sum2 % 256 - Read in next byte and repeat until EOF
Finally, we place both sum1 and sum2 in a 16-bit integer by left shifting sum2 by 8 and adding the two values together.
Pixel Format
aif files support the following pixel formats:
AIF_FMT_RGB8- Each pixel is a 24-bit RGB valueAIF_FMT_GRAY8- Each pixel is an 8-bit shade of gray
aif.h.
Compression
aif files support the following compression types:
AIF_COMPRESSION_NONE- UncompressedAIF_COMPRESSION_RLE- RLE (Run length encoding compression, see below)
aif.h.
Width, Height
width refers to the number of pixels (columns) in each row
height refers to the number of rows
The width and height must both be positive integers.
Pixel Data Offset
How many bytes from the start of the file the pixel data begins.
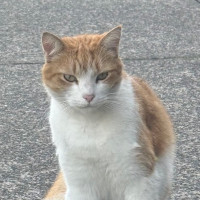
Viewing AIF Images
Run 1521 aif-convert to convert an AIF image to a PNG and have a look at what your program did!
$ 1521 aif-convert aif-examples/cat.aif
You can then open this png in vscode!
Stage 0
Get Information About Given Image Files
In stage 0 you will need to partially complete the provided
stage1_info function.
The stage1_info is given a number of files, n_files,
and a an array of aif filenames files.
For each aif file in the files array you should print out
information in the following format:
<aif-examples/cat.aif>:
File-size: 120020 bytes
Checksum: 7c 9c
Pixel format: 8-bit RGB
Compression: none
Width: 200 px
Height: 200 px
Stage 1
In stage 1 you need complete the stage1_info function by verifying
that the information in the given files is valid.
You will need to verify that the magic number, the width and height, the pixel format, and, the image checksum are all correct.
A valid magic number is the sequence of bytes 0x41, 0x49, 0x46, 0x00 or
string "AIF\0"
The width and height are valid if they are greater than 0.
The pixel format is valid if it is a recognised aif pixel format. Valid pixel formats are listed here.
The checksum is valid if the checksum you calculate matches the checksum stored in the aif file.
If any of the above are invalid, a message should be printed in the format below:
1521 aif-tools info aif-examples/invalid-width.aif aif-examples/invalid-format.aif  aif-examples/invalid-checksum.aif
<aif-examples/invalid-width.aif>:
File-size: 20 bytes
Checksum: d9 e7
Pixel format: 8-bit RGB
Compression: none
Width: 0 px INVALID
Height: 2 px
<aif-examples/invalid-format.aif>:
File-size: 24 bytes
Checksum: 5d 2d
Pixel format: Invalid
Compression: none
Width: 2 px
Height: 2 px
<aif-examples/invalid-checksum.aif>:
File-size: 320 bytes
Checksum: 67 67 INVALID, calculated 5d f9
Pixel format: 8-bit RGB
Compression: none
Width: 10 px
Height: 10 px
Stage 2
Accessing Pixel Data
Pixel data is stored in rows meaning you access the pixels across. Carefully consider how you read and write pixel data to make accessing different color formats and compressed/uncompressed images easier!
You do not have to deal with compression until stage 4 and stage 5.
Adjust image brightness
In this subset take the given image and brighten it by a given percentage.
$ ./aif-tools brighten +20 cat.aif bright-cat.aif
$ ./aif-tools brighten -15 cat.aif dark-cat.aif
For any given ‘RGB’ color it can be useful to find the chroma (how deep the color is) and the luminance (how bright the color is). By finding and manipulating this luminance we can brighten or darken the image!
Luckily, this is done for you, in brighten_rgb , however you should read below to see how it works! The color value is passed as a 24-bit integer and a new adjusted color value is returned.
uint32_t old_pixel = ...
uint32_t new_pixel = brighten_rgb(old_pixel, amount);
// write the new pixel to the output image...
For gray images we can just do pixel * (100 + amount) / 100 . However, you must make sure if the color value overflows (goes above 255) that it gets capped to 255.
brighten_rgb
To brighten or darken an RGB color, we must split each pixel into its color components (r, g, b). For a gray image we can ignore this step.
We then get the midpoint of the brightest and darkest color component:
// For an rgb image
r = pixel[0];
g = pixel[1];
b = pixel[2];
lightest = max(r, g, b)
darkest = min(r, g, b)
luminance = (brightest + darkest) / 2
// For a gray image
uint8_t pixel;
luminance = pixel;
We then get the ‘chroma’ (intensity of the color) by subtracting the brightest and darkest
chroma = brightest - darkest
We can then use luminance and chroma to find the base ‘lightness’ of the color. This ‘lightness’ is a constant value added to each r, g, b component. We can find it as such:
lightness = luminance - chroma / 2
By manipulating the luminance value we increase or decrease this constant ‘lightness’ and can brighten and darken the color!
Stage 3
Convert between colour formats
Convert the image to grayscale
$ ./aif-tools convert-color gray8 cat.aif cat-gray8.aif
Converting from RGB to Grayscale
When we want to convert an RGB color value to grayscale, its not at simple as just taking the average of the red green and blue values. The eye perceives green to be brighter than blue and we need to take this into account when converting to gray.
This gives us the following formula to calculate the luma of a given RGB color.
red = pixel[0]
green = pixel[1]
blue = pixel[2]
gray = (red * 299 + green * 587 + blue * 114) / 1000
This will become our new 1-byte pixel value!
Converting from 8-bit grayscale to RGB
In order to convert back, we can just duplicate a given value across red, green and blue.
GG -> GG GG GG
i.e. A value of 128 (0x80) will become 80 80 80 .
red = gray
green = gray
blue = gray
pixel = {red, green, blue}
Stage 4
Run-length encoding decompression
Decompress the provided image file.
./aif-tools decompress cat-compressed.aif cat.aif
To compress AIF images we use a simple compression method called run-length encoding. In subset 4 you only need to worry about decompression.
RLE involves simply specifying a number of times to repeat the following sequence of bytes. This looks like the following:
[NNNN] [XX] pixel_value_repeated
[NNNN] [00] [XX] pixel_value00 pixel_value01 ... pixel_value(XX-1)
NNNN - number of bytes in row
XX - number of pixels
pixel_value_repeated - pixel repeated XX times
pixel_value00 ... pixel_value(XX-1) - part of a non-repeating sequence of pixels
For example, with an rgb image we have 3 bytes per pixel. For the following pixel values (as hex numbers):
000000 000000 000000 ff5555 ff5555 fcfcfc 000000 670067
First of all we need to give the number of total bytes in the row. We can leave this as zero now and come back to it once we are done.
You can see that 00 00 00 is repeated 3 times, so this becomes 03 00 00 00 meaning we want to repeat the color 00 00 00 (black) 3 times!
00 00 03 00 00 00
Then we repeat ff 55 55 twice giving 02 ff 55 55.
00 00 03 00 00 00 02 ff 55 55
As you can see the next 3 pixels do not repeat, so we use zero to indicate no repeating. We have 3 non-repeating pixels giving us 00 03 fc fc fc 00 00 00 67 00 67 .
00 00 03 00 00 00 02 ff 55 55 00 03 fc fc fc 00 00 00 67 00 67
We have now written 0x13 (19) bytes so we write it (as a little endian value 13 00) giving us our final row:
13 00 03 00 00 00 02 ff 55 55 00 03 fc fc fc 00 00 00 67 00 67
As you might notice this works great for simple images, such as graphics and screenshots but often actually increases the file-size of most normal photos! More advanced formats have varying ways of dealing with this, such as JPEG which can reduce image detail in order to greatly improve compression.
You are not required to check for invalid sequences when decompressing. You should however continue to verify the header as in previous subsets, and check for early end-of-file.
Stage 5
RLE Compression
Implement RLE compression for AIF images.
$ ./aif-tools compress cat.aif cat-compressed.aif
Assumptions
- A single pixel value should be encoded with
00 01 <pixel>, i.e. a single00 00 FFbecomes00 01 00 00 FF - If a sequence of pixels exceeds 255, write
255 <pixel>and start a new sequence - Rows will not exceed 65535 bytes.
Update subsets 2 and 3 to support compression
Update subsets 2 and 3 to support compressed images. If the input is compressed the output should also be compressed.
Reference Implementation
A reference implementation is a common, efficient, and effective method to provide or define an operational specification; and it's something you will likely work with after you leave UNSW.
We've provided a reference implementation,
1521 aif-tools,
which you can use to find
the correct outputs and behaviours for any input:
1521 aif-examples cd aif-examples 1521 aif-tools info cat.aif: File-size: 120020 bytes Checksum: 7c 9c Pixel format: 8-bit RGB Compression: none Width: 200 px Height: 200 px
Every concrete example shown above is runnable using the reference;
run 1521 aif-tools instead of ./aif-tools.
Where any aspect of this assignment is undefined in this specification, you should match the behaviour exhibited by the reference implementation. Discovering and matching the reference implementation's behaviour is deliberately a part of this assignment.
If you discover what you believe to be a bug in the reference implementation, please report it in the class forum. If it is a bug, we may fix the bug; or otherwise indicate that you do not need to match the reference implementation's behaviour in that specific case.
Handling Errors
- Error checking is an important part of this assignment. Automarking will test error handling.
- You should exactly match the reference solution's error messages
- Error messages should be one line and be written to stderr (not stdout).
- aif-tools should exit with status 1 after an error.
- You do not have to free memory or close files before exiting in the event of an error.
- aif-tools should check all file operations for errors.
- You cannot assume the provided AIF images are valid. You should print an appropriate error and exit with status 1 in the following cases:
- The provided AIF file has an incorrect magic number.
- The provided AIF file has an invalid pixel format.
- The provided AIF file has an invalid compression type.
- The provided AIF file has an invalid height.
- The provided AIF file has an invalid width.
- The provided AIF file has an invalid checksum.
- The provided AIF file does not contain enough bytes: EOF is encountered while reading the header.
- The provided AIF file does not contain enough bytes: EOF is ecountered while reading pixel data.
- The state of or presence of an output file will not be checked if an error occurs.
- For stage 1, the only additional error checking required is that the input file is successfully opened and no unexpected EOF are encountered while reading the header data. Invalid header fields should be reported to stdout as the autotests enforce and no early termination should be performed.
Assessment
Testing
When you think your program is working,
you can use autotest
to run some simple automated tests:
1521 autotest aif [optionally: any extra .c or .h files]You can also run autotests for a specific subset. For example, to run all tests from subset 1:
1521 autotest aif stage1 [optionally: any extra .c or .h files]Some tests are more complex than others. If you are failing more than one test, you are encouraged to focus on solving the first of those failing tests. To do so, you can run a specific test by giving its name to the
autotest command:
1521 autotest aif stage1-1 [optionally: any extra .c or .h files]
1521 autotest will not test everything.
Always do your own testing.
Automarking will be run by the lecturer after the submission deadline,
using a superset of tests to those autotest runs for you.
Submission
When you are finished working on the assignment,
you must submit your work by running give:
give cs1521 ass2_aif aif-tools.c [optionally: any extra .c or .h files]
You must run give before Week 10 Friday 18:00:00
to obtain the marks for this assignment.
Note that this is an individual exercise,
the work you submit with give must be entirely your own.
You can run give multiple times.
Only your last submission will be marked.
If you are working at home, you may find it more convenient to upload your work via give's web interface.
You cannot obtain marks by emailing your code to tutors or lecturers.
You can check your latest submission on CSE servers with:
1521 classrun check ass2_aif
You can check the files you have submitted here.
Manual marking will be done by your tutor, who will mark for style and readability, as described in the Assessment section below. After your tutor has assessed your work, you can view your results here; The resulting mark will also be available via give's web interface.
Due Date
This assignment is due Week 10 Friday 18:00:00 (2025-11-21 18:00:00).
The UNSW standard late penalty for assessment is 5% per day for 5 days - this is implemented hourly for this assignment.
Your assignment mark will be reduced by 0.2% for each hour (or part thereof) late past the submission deadline.
For example, if an assignment worth 60% was submitted half an hour late, it would be awarded 59.8%, whereas if it was submitted past 10 hours late, it would be awarded 57.8%.
Beware - submissions 5 or more days late will receive zero marks. This again is the UNSW standard assessment policy.
Assessment Scheme
This assignment will contribute 15 marks to your final COMP1521 mark.
80% of the marks for assignment 2 will come from the performance of your code on a large series of tests.
20% of the marks for assignment 2 will come from hand marking. These marks will be awarded on the basis of clarity, commenting, elegance and style. In other words, you will be assessed on how easy it is for a human to read and understand your program.
An indicative assessment scheme for performance follows. The lecturer may vary the assessment scheme after inspecting the assignment submissions, but it is likely to be broadly similar to the following:
| 100% for performance | completely working subsets 1, 2, 3, 4 & 5 - everything works! |
|---|---|
| 90% for performance | completely working subsets 1, 2, 3 & 4. |
| 80% for performance | completely working subsets 1, 2 & 3 |
| 65% for performance | completely working subsets 1 & 2. |
| 50% for performance | completely working subset 1. |
| 30-40% for performance | good progress, but not passing subset 1 autotests. |
| 0% | knowingly providing your work to anyone and it is subsequently submitted (by anyone). |
| 0 FL for COMP1521 | submitting any other person's work; this includes joint work. |
| academic misconduct | submitting another person's work without their consent; paying another person to do work for you. |
An indicative assessment scheme for style follows. The lecturer may vary the assessment scheme after inspecting the assignment submissions, but it is likely to be broadly similar to the following:
| 100% for style | perfect style |
|---|---|
| 90% for style | great style, almost all style characteristics perfect. |
| 80% for style | good style, one or two style characteristics not well done. |
| 70% for style | good style, a few style characteristics not well done. |
| 60% for style | ok style, an attempt at most style characteristics. |
| ≤ 50% for style | an attempt at style. |
An indicative style rubric follows:
-
Formatting (6/20):
- Whitespace (e.g.
1 + 2instead of1+2) - Indentation (consistent, tabs or spaces are okay)
- Line length (below 80 characters unless very exceptional)
- Line breaks (using vertical whitespace to improve readability)
- Whitespace (e.g.
-
Documentation (8/20):
- Header comment (with name and zID)
- Function comments (above each function with a good description)
- Descriptive variable names (e.g.
char *home_directoryinstead ofchar *h) - Descriptive function names (e.g.
get_home_directoryinstead ofget_hd) - Sensible commenting throughout the code (don't comment every single line; leave comments when necessary)
-
Elegance (5/20):
- Does this code avoid redundancy? (e.g. Don't repeat yourself!)
- Are helper functions used to reduce complexity? (functions should be small and simple where possible)
- Are constants appropriately created and used? (magic numbers should be avoided)
-
Portability (1/20):
- Would this code be able to compile and behave as expected on other POSIX-compliant machines? (using standard libraries without platform-specific code)
- Does this code make any assumptions about the endianness of the machine it is running on?
Note that the following penalties apply to your total mark for plagiarism:
| 0 for asst2 | knowingly providing your work to anyone and it is subsequently submitted (by anyone). |
|---|---|
| 0 FL for COMP1521 |
submitting any other person's work; this includes joint work. |
| academic misconduct |
submitting another person's work without their consent; paying another person to do work for you. |
Intermediate Versions of Work
You are required to submit intermediate versions of your assignment.
Every time you work on the assignment
and make some progress
you should copy your work to your CSE account
and submit it using the give command above.
It is fine if intermediate versions do not compile
or otherwise fail submission tests.
Only the final submitted version of your assignment will be marked.
Assignment Conditions
Joint work is not permitted on this assignment.
This is an individual assignment. The work you submit must be entirely your own work: submission of work even partly written by any other person is not permitted.
Do not request help from anyone other than the teaching staff of COMP1521 — for example, in the course forum, or in help sessions.
Do not post your assignment code to the course forum. The teaching staff can view code you have recently submitted with give, or recently autotested.
Assignment submissions are routinely examined both automatically and manually for work written by others.
Rationale: this assignment is designed to develop the individual skills needed to produce an entire working program. Using code written by, or taken from, other people will stop you learning these skills. Other CSE courses focus on skills needed for working in a team.
The use of generative tools such as Github Copilot, ChatGPT, Google Gemini is not permitted on this assignment.
Rationale: this assignment is designed to develop your understanding of basic concepts. Using synthesis tools will stop you learning these fundamental concepts, which will significantly impact your ability to complete future courses.
Sharing, publishing, or distributing your assignment work is not permitted.
Do not provide or show your assignment work to any other person, other than the teaching staff of COMP1521. For example, do not message your work to friends.
Do not publish your assignment code via the Internet. For example, do not place your assignment in a public GitHub repository.
Rationale: by publishing or sharing your work, you are facilitating other students using your work. If other students find your assignment work and submit part or all of it as their own work, you may become involved in an academic integrity investigation.
Sharing, publishing, or distributing your assignment work after the completion of COMP1521 is not permitted.
For example, do not place your assignment in a public GitHub repository after this offering of COMP1521 is over.
Rationale: COMP1521 may reuse assignment themes covering similar concepts and content. If students in future terms find your assignment work and submit part or all of it as their own work, you may become involved in an academic integrity investigation.
Violation of any of the above conditions may result in an academic integrity investigation, with possible penalties up to and including a mark of 0 in COMP1521, and exclusion from future studies at UNSW. For more information, read the UNSW Student Code, or contact the course account.